This documentation explains how to create your own PDF reports through scripting.
A complete script is available here. This script follows the path recommended below explaining how to create a report.
The recommended path is as follow:
The structure that will contain all the data to be integrated in reports is the class SReportData.
This structure is exactly the same as the one created in 3DReshaper application by some commands creating inspection results.
It therefore contains information such as:
Except from the viewset, every information in the SReportData must be named with a unique name. As an example, it is not possible to store two tables of labels named as "Inspection Table".
There are two ways to create a SReport data structure:
A good example of function delivering a SReportData as an output is SPoly.Compare(). In this case, the SReport already contains:
With a SReportData created this way, one could directly go to the SReport generation described below as the software will recognize it as an inspection coming from the inspection routine and will apply the default template.
In order to define precisely the view that should be reported, one can explicitly hide or show some components, change the view direction and finally call the function dedicated to update the view.
Code sample updating the view:
 SetViewDir(AXIS_X)

 ZoomAll()

 myReportData.UpdateMainViewSet()
It is very common that reports contains tables of labels (deviations, distances between points...).
A SReportData can contain several tables of labels: for example deviation labels and distance labels.
Code sample adding labels
 myReportData.AddLabels("Deviations",DeviationLabels)

 myReportData.AddLabels("Distances",DistanceLabels)
In order to use in an automated way a customized template, it is necessary to create it beforehand!
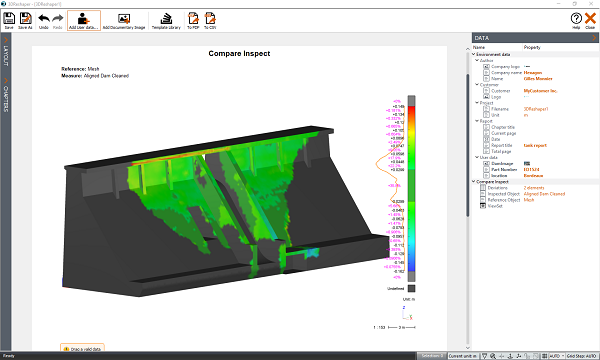
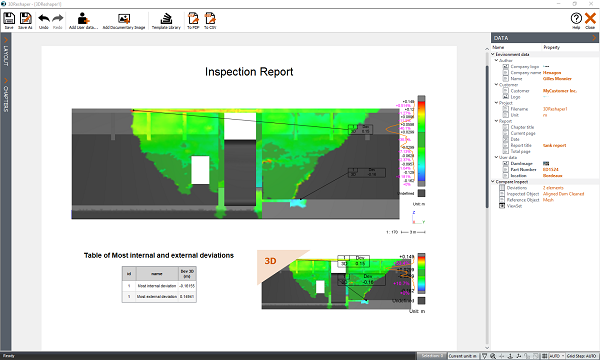
The template has to be created using the editor with a document containing the exact same data added to the document by script.
Once the data have been organized accordingly in a template, the template has to be saved to .mlt format. This file is saved on the computer and can then be shared or moved next to the script.
The images below show:


The final step is to add each SReportData as a chapter to a report, with, for each of them, the corresponding template.
Footer and header, as well as generic report options (page format, number of decimals...) can also be defined at this step, before being exported to PDF.
How to create the SReport object:
theReport = SReport.New();
How to set report options, such as the format, the margins, etc.
 var reportOpt = {

 PaperFormat : SReport.A4,

 MarginTop : 5,

 MarginBottom : 0,

 Orientation : 1,

 HeaderPolicy : 1,

 FooterPolicy : 0,

 LengthDecimals : 3 };


 theReport.SetReportOptions(reportOpt);
How to add chapters to the report:
 var res = theReport.AddChapter(AllData.reportChapter1, CurrentScriptPath() + '/CustomInspectionReport.mlt');

 if (res.ErrorCode != 0)

 throw new Error( 'Failed to add chapter 1' );


 res = theReport.AddChapter(AllData.reportChapter2, CurrentScriptPath() + '/Landscape_4Views.mlt');

 if (res.ErrorCode != 0)

 throw new Error( 'Failed to add chapter 2' );
How to export a PDF file from the SReport object:
 res = theReport.ExportReportPDF(CurrentScriptPath() + '/InspectionReports.pdf');

 if (res.ErrorCode != 0)

 throw new Error( 'Failed to create the PDF file' );