Scan point clouds
If the software is directly connected to a measuring arm or a handheld scanner managed by the RDS, you can go to Measure through RDS.
Arm settings
Launch the settings page Arm Settings in order to adjust the arm settings before scanning points. The software automatically detects if the measurement device is in probe mode or scanner mode. When it is on scanner mode, the following parameters can be managed.
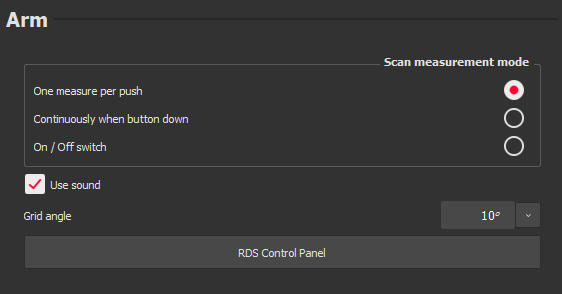
Main parameters are:
Measurement mode:
One measure per push is useful when you measure with a probe.
Continuously when button down or On/Off switch are more suited to measure with a scanner.
Scan point clouds
First, set the arm in scanner mode and launch the command Measure through RDS.
In the scene, a white line corresponding to the laser stripe seen by the embedded camera is displayed. So, to be able to acquire points, you must see the line (you have at the same time the preview of the current 3D points in the scene). In any situation, you need to take care of the focus between the laser and the camera (try to have the point laser on the laser line). Otherwise, the points will not be computed by the arm.
Once you have some points displayed in the scene (i.e. the focus is correct), you can launch an acquisition. Then, move the scanner on all the parts you want to scan, as a painter would do to paint the part. You see at the same time the part displayed in 3D in the scene (with a huge amount of points). Actually, you obtain a kind of reconstruction of the real part in the software.
Use the function Auto view to have a look at the region where you want to be precise, i.e. where you need many points.
Once the scan is complete, you can exit the command.