 |
Cyclone 3DR Script
from Technodigit, part of Hexagon. Copyright 1997-2024.
|
 |
Cyclone 3DR Script
from Technodigit, part of Hexagon. Copyright 1997-2024.
|
Creating a custom form in script can be achieved through the use of the SDialog class.
It is done in three steps:
SDialog supports several types of components depending on your use case.
| Component | Methods |
|---|---|
| Input text | SDialog.AddTextField |
| Boolean value (checkbox) | SDialog.AddBoolean |
| List of strings (combo box or radio buttons) | SDialog.AddChoices |
| Message | SDialog.AddText |
| Image | SDialog.AddImage |
| Numerical values (without unit) | SDialog.AddInt, SDialog.AddFloat |
| Length | SDialog.AddLength |
| Angle | SDialog.AddAngle |
| 3D point coordinates | SDialog.AddPoint |
| 3D vector coordinates | SDialog.AddVector |
Each component supports attributes allowing to customize the behavior and add constraints to improve the user experience.
Refer to each component documentation to additional details.
| Attribute | Description | Optional |
|---|---|---|
id | Internal unique key you will have to call to use the result | No |
name | Text you will see in the dialog next to the component. Like the button title, field label, etc. | No |
tooltip | Text displayed when hovering over a component. | Yes |
choices | Table of strings: one for each choice. | No |
value | The default value of the component. | Yes |
saveValue | To specify whether the component value is replaced by the last value given by the user at startup. | Yes |
readOnly | To specify if the user can edit the component or not. Consequently, the component can only display a value. | Yes |
min/max | To restrain the range of numerical components, such as length. | Yes |
canBeEmpty | To specify whether a field can be empty or not. If false, and empty field will turn to red and dialog buttons will be disabled. | Yes |
As an example, here is a code sample to insert an angle field to an existing dialog:
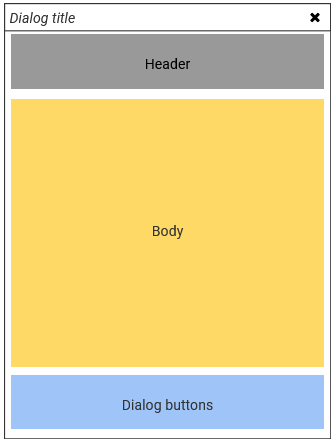
The layout of a dialog is composed of three main areas: a header, a body and a buttons area.

This area allows to place some context or general instructions to the user.
By default, there is no header. It can be inserted by calling SDialog.SetHeader.
Optionally, a logo can be inserted next to the text.
The main area of the dialog where all components are inserted in group.
By default, only one group is created to store all components.
Custom groups can be added through SDialog.BeginGroup.
This area contains all validation buttons of the dialog (OK, Cancel, etc.).
Any of these buttons will stop the execution of the SDialog.Run method once it has been clicked.
By default, OK and Cancel buttons are inserted. For specific cases, use SDialog.SetButtons.
SDialog provides also two preset popups for informing the user (SDialog.Message) or for asking the user a question (SDialog.Question).
Once your form is created and configured, you must call SDialog.Run to execute and show it.
Then the script execution will wait for the user to click a button from the dialog button area to continue the execution.
The output result will contain an error code corresponding to the clicked button and the fields declared as inputs("id").
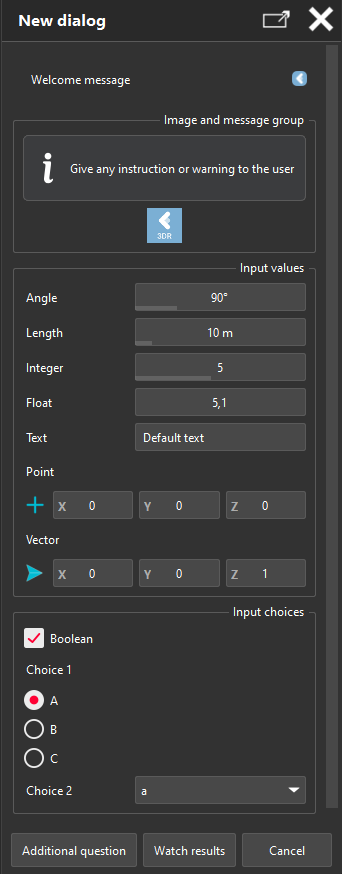
The following example describes how to instantiate a form and fill it with the most common components:
This code should display this dialog:
