This command detects some clashes between surfacic objects and clouds and generates report data.
Select meshes, surfacic features or CAD objects and clouds. Then launch the command.
You can also reload a clash project by selecting a clash analysis project.
It is highly recommended not to modify Clash Analysis folder nevertheless objects can be renamed safely.
|

|
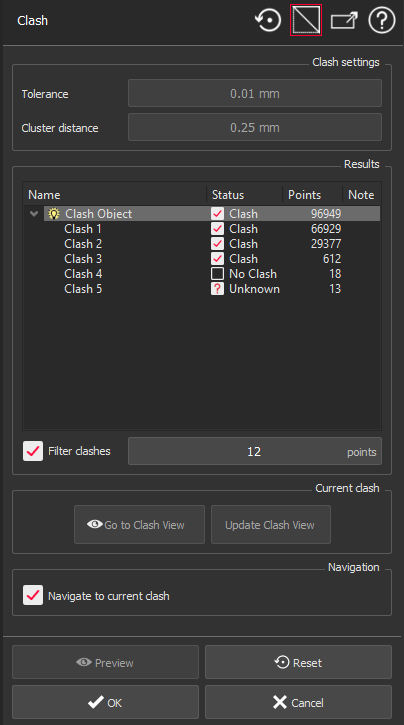
Set clash detection parameters:
Points closer than the Tolerance value are considered as clashes.
Cluster distance allows merging nearby clashes into one according to a given distance.
After a computation, click Reset to modify these settings: note previous results will be lost since potential clashes will be different.
When computation is done, the user interface guides you to classify potential clashes to create a report. Results will be displayed in a table:
You can filter insignificant clashes using their number of points (Filter clashes).
Then browse the list:
Each object can have several clash areas: each one has to be classified. Use SPACE shortcut to change the status or use the corresponding checkbox. Use the bulb to show/hide the current object.
In left view, you will see the corresponding object and the points in clash. Check Navigate to current clash to zoom automatically on the current clash.
In right view, you can visualize the object in its environment. Clash areas are represented by a colored box (the color, like a traffic light, depends on the current classification). Note a limit box is available to focus on each area.
Click Update Clash View: the right scene will be used in the report.
Click Go to Clash View: the right scene will be updated to show you what view is currently stored. The default view is always a top view.
Run the analysis with Preview. Validate the command with OK or close the dialog box with Cancel.
|
