
The use of this command differs from other commands. Instead of selecting objects before entering the command, you can launch the command and use the visible objects to define the input for the computation.
To extract a rectangle, launch the command and click a seed on objects.
Note
Once a starting point is clicked, the computation is launched. You can cancel the current computation by pressing ESC or by clicking another point.
A starting point is a seed from which an ideal shape is computed.
|
|
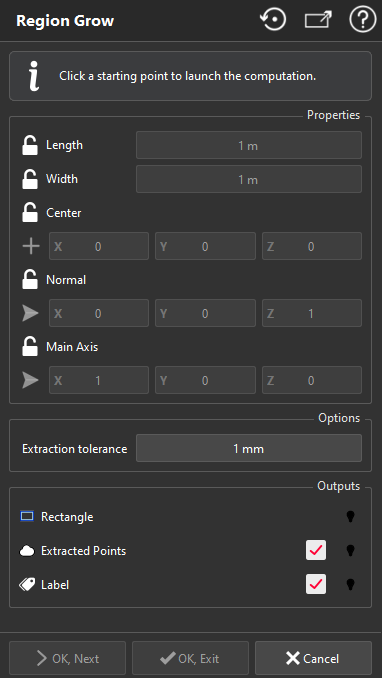
You can force the length by clicking on the lock Length and then, define the value.
You can force the width by clicking on the lock Width and then, define the value.
You can force a Point by clicking on the lock. You can either enter the XYZ coordinates in the edit controls or click on the icon  to click a point in the scene.
You can force a Normal by clicking on the lock. You can either enter the XYZ values of the vector in the edit controls or click on the icon  to define a Direction in the scene.
You can also force the main axis of the rectangle by clicking on the lock M
ain axis
. To define the direction, you can either enter the XYZ values of the vector in the edit controls or click on the icon
 to define a
Direction
in the scene.
to define a
Direction
in the scene.
As outputs, choose to have the extracted rectangle, a cloud containing all extracted points, and the label.
Validate the command with OK or close the dialog box with Cancel. You can create several shapes one after the other using the Ok, Next button.
The Extraction tolerance corresponds to the extraction of the plane which contains the rectangle (Extraction performed in two steps: plane and contour extractions).
|