
Slice Definition is the first step of Scan to Plan workflow. This command creates thin slices from a point cloud which will be used to draw plans and elevations.
Select one or several clouds and launch the command.
|
|
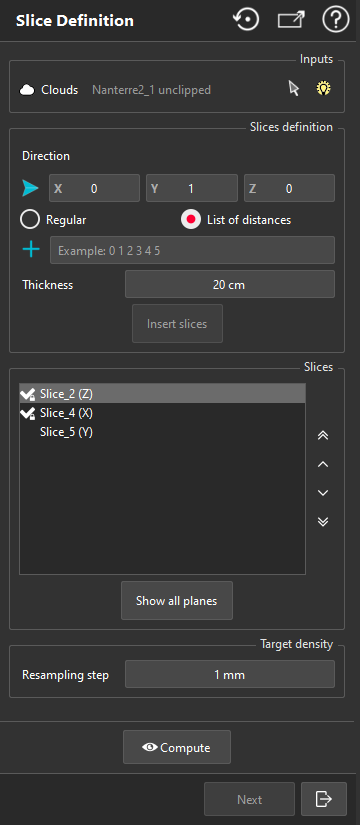
Select the slice(s) Direction.
Choose where to create the slices, two methods are available:
Regular to have slices with a regular step. You can change the Range to All over the selection or within a specified range. Use Pass Through option to offset the slices.
List of distances to specify the exact position of the desired slice(s).
Set the slices Thickness.
Click on Insert slices to add them to the list of slices below.
Optionally, repeat steps from 1 to 4 to add slices according to another direction.
When the Slices list has been filled, you can visualize and edit them individually:
Change their position and thickness thanks to the limit box.
Optionally, rename them.
When hovering over a slice, two buttons appear:
A toggle to deactivate the limit box corresponding to the current slice to visualize the whole cloud.
A cross to remove the slice.
Show all planes displays all slices median planes. Click again to hide them.
Set the Resampling step according to the expected level of details.
Click on Compute to work out the slices. Slices are flattened and resampled to remove duplicated points.
Once the computation is done, Reset button removes the slices (if they have not been validated by Next or Exit).
Next definitely validates the slices and opens the second step of the workflow: Extract Plans.
Exit definitely validates the slices and quits the workflow. Note you will be able to resume the workflow later.
|
Locked slices
Once a slice has been validated, the edition (such as renaming, limit box edition) is not possible.