
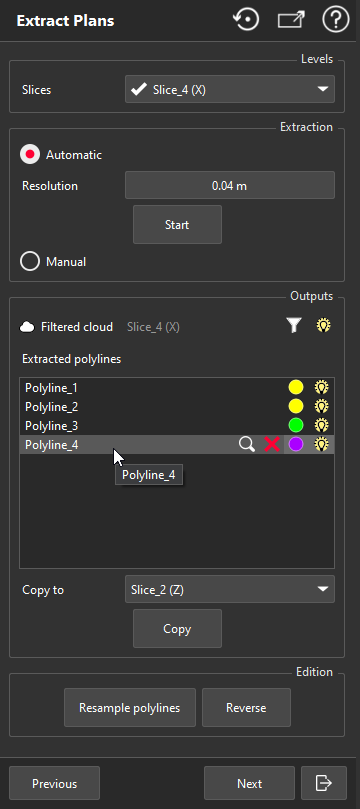
Extract Plans is the second step of the Scan to Plan workflow. This command draws plans and elevations, with semi-automatic and manual modes, corresponding to defined slices.
|
|
Choose the slice to work on.
There are two extraction methods. Select one and click Start to begin or stop the extraction.
Automatic: click seed points on the current slice to automatically compute polylines. Choose seed points on straight areas for good results.
Resolution is the only parameter used for automatic extraction.
We recommend setting this parameter half the thickness of the thinnest wall to extract both sides. The default value is also a good compromise.
Manual: draw manually the polylines using Draw Polyline tool.
FloorPlanner: the wall will be created on the left side of the polyline.
When not extracting, you can click on a polyline to edit it thanks to Edit Polyline.
Points which have been used by automatic extractions are hidden by default. Click the funnel icon to display them to draw or edit polylines.
All the extracted polylines are in Outputs list. You can rename, zoom on, delete, change color and hide each one.
You can bulk Copy all extracted polylines from the selected slice to another one.
Resample polylines optimizes the number of vertices of selected polylines.
You can change polylines directions with Reverse.
Previous validates the polylines and opens the first step of the workflow: Slice Definition.
Next validates the polylines and starts the third step of the workflow: Export Plans.
Exit validates the polylines and quits the workflow. Note you will be able to resume the workflow later.
|