Exercise: Align clouds according to specific points (surveying target centers)
Open the file AlignTargets.3dr
This file contains two clouds to align according to surveying targets, Cloud 1 and Cloud 2. Show both clouds, then select "Cloud 2" and go to N Points Registration.
The screen is automatically divided into two parts. On the left, there is the selected cloud (the one that will move); on the right, the other one (the one that will not move). In the bottom toolbar, select only the option Surveying target and set a checkered pattern target with a Diameter of 0.15.
In the Define constraints section, select the option Constraint rotation axis and choose Z as the Z axis is aligned with the vertical in both clouds. Uncheck the others options to allow translations along the three axes.
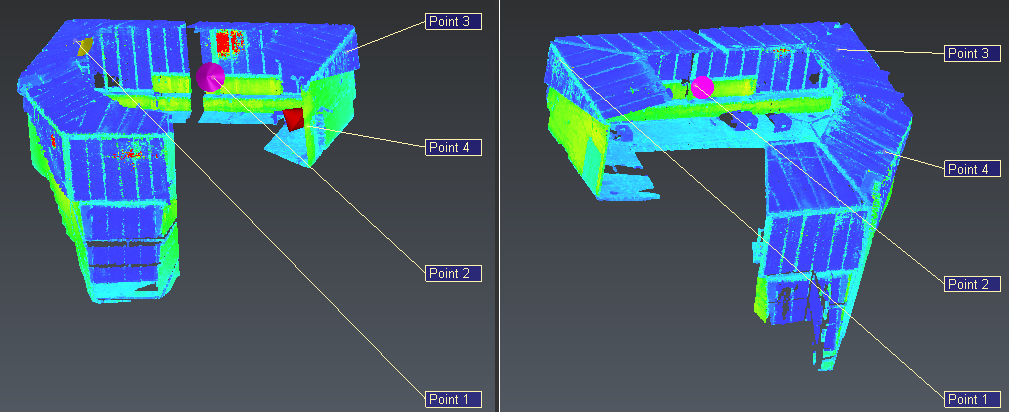 Use target centers to align point clouds
Find the target corresponding to the point 1 on the previous figure and then click a point on the target in the left view. The created point will be automatically the target center. Repeat for the three other targets (points 2, 3 and 4). Then click the same targets in the same order in the right view.
Unselect the option Apply Bestfit as we want to do an alignment according to targets only.
Once the four couples of points have been clicked, you can click Preview.
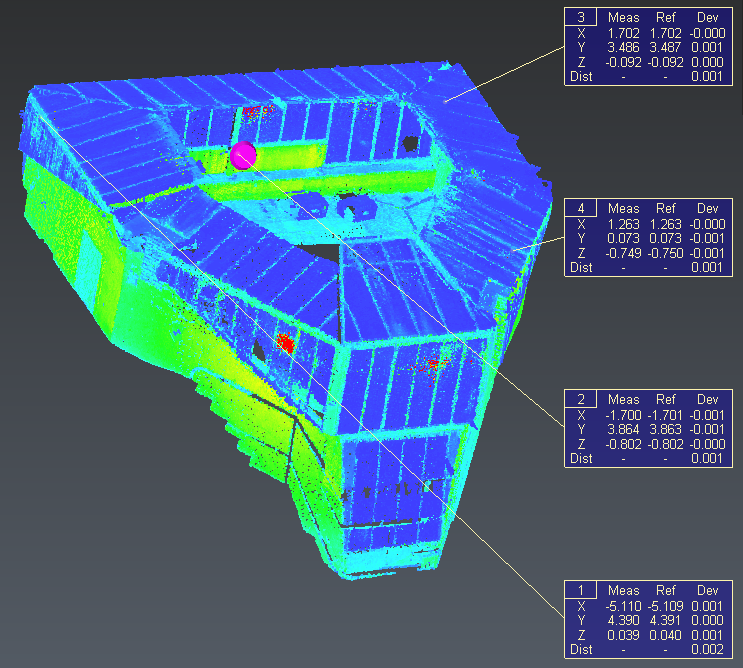 Labels to show deviations during the alignment according targets (less than 2mm in this case)
One label per couple of points will be created in the right view in order to see deviations. Identify the couple with the biggest deviation. Cancel the alignment by clicking Reset. Select the mode Vertex / End and click on the point corresponding to the biggest deviation (left or right view) in order to inactivate this couple of points. The arrow on the target becomes gray. Click on Preview again. The deviations should be lower and the alignment done with only 3 couples of points.
Click OK to validate. Both clouds are now aligned: you can use the command Merge Clouds in order to merge them. Note that the color of your cloud might change during the merge because the cloud contains both texture and inspection information. You can select the cloud to restore the Inspection representation then go to Edit Colors to take only one color level.
Note: if you make a mistake during the selection of the target, you can reverse step by step by pressing the DEL key.