Exercise: Improve the 3D Mesh of the Samothrace Victory
Open the file Victory.3dr.
Then show only the mesh Victory (complete). Throughout this exercise, we will see how to cut a mesh and how to work independently on different parts of the mesh (by reducing a part and, on the contrary, refining another one).
Cut / remove triangles
Select the mesh Victory (complete) and go to the command Clean / Separate Mesh. This command allows you to delete triangles or to cut your mesh in several pieces. Here we will cut the two wings in order to have 3 different meshes.
Select Polyline tool, and then select the options Select Through.
Select through means that we will select all triangles inside the polygon, even the hidden ones. Set the view in order to see the entire wing and draw a polygon around it (like in following picture).
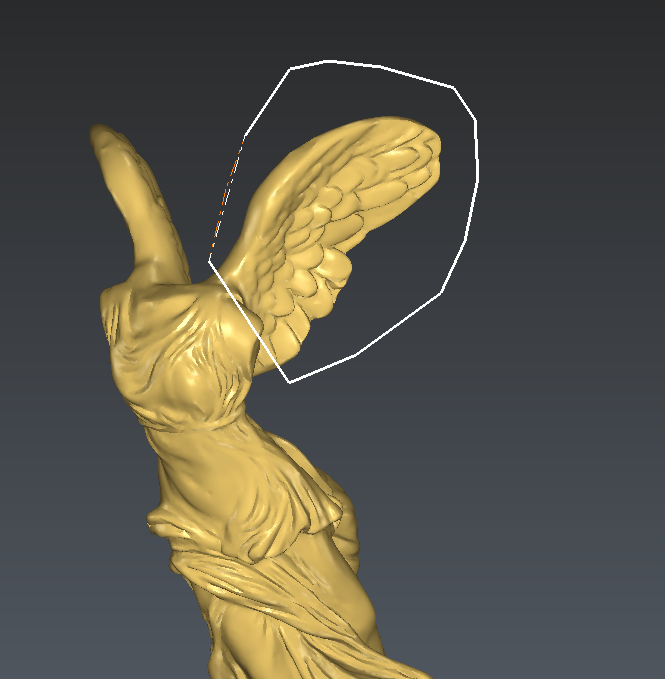 Cut a part of a mesh by selecting triangles inside a polygon
Press Enter to validate the selection. Then do the same for the second wing.
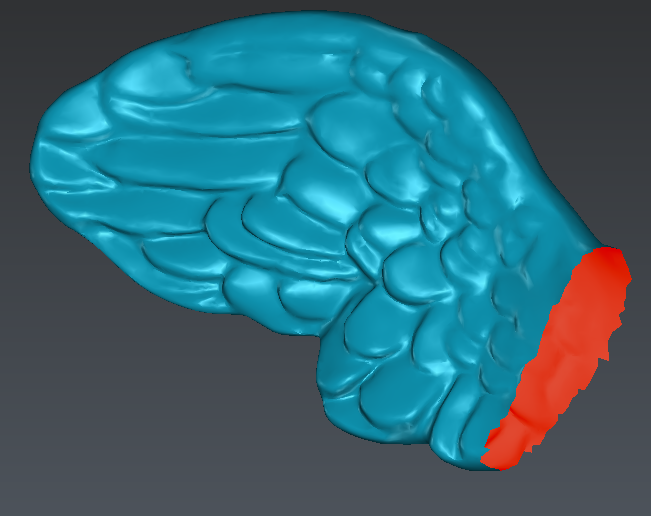
You can select mode Remove from selection (shortcut "-") to remove triangles from the current selection before validating.
Once the two wings are selected, click Split and then OK to validate. If you want to delete triangles, click on Delete.
Note that all pieces of meshes are grouped into a single mesh by default.
Refine mesh
We saw in the 3D mesh creation chapter that we can do a mesh in two steps: create a rough mesh and then refine it in order to add details to the mesh. The command Refine Mesh from Cloud Interpolation corresponds to this second step.
Select the cloud Victory and the mesh Wing 1 (to refine), and then go to Refine Mesh from Cloud Interpolation. We have to select the cloud and the mesh because we will refine the mesh with the points from the cloud. As you can see, it is the same command as the one described in the Exercise: Create a 3D mesh of the Samothrace Victory.
Parameters to obtain the actual mesh were Interpolate new points with 0.05 for the Deviation error. If we want to refine the mesh, we have to reduce this deviation error.
Enter for example:
Choose Refine with deviation error
0.02 for the Deviation error.
0.2 for the Minimum triangle size
0.5 for the Distance
No free border modification, so that we can very easily merge all the parts at the end
 Refine with deviation error and interpolate new points
Click Preview and OK, Exit to validate. The wing is now refined. Change the representation to Flat + Wire for example, and compare the triangle size on the new wing and on the rest of the mesh. You will see that their sizes are smaller.
Reduce the number of triangles
Sometimes you need to reduce the number of triangles if:
you want to export a very light mesh, or
you do not need a lot of details on your mesh.
Select the mesh Wing 2. Then launch the command Reduce. This command contains two main options as there are two methods to reduce a mesh:
Control the deviation: means that you enter a maximum deviation; the software will minimize the number of triangles and respect the given deviation.
Keep the aspect: means that you enter a number of triangles; the software will reduce the mesh in order to respect this number.
Usually, the Control the deviation method gives a better result. So select this option, and then:
Enter 0.5 mm for the Deviation,
Select the options Optimize vertices position and Try to preserve equilaterality,
Unselect the option Reduce on free borders in order not to modify the external border, and
Select the option Preserve sharp edges, and set the Angle between facets to 10° and the Specific deviation to 0.05 mm.
Then click Preview to see the result. The given reduction rate is 56.02%, it means than we divided the mesh size approximately by 2.