Exercise: Learn all the different options to click a point
In the software, each time you have to click a point, a toolbar will appear. This toolbar will allow you to choose between several options to click a point. Some options can be selected at the same time depending on their compatibility (for example, if you select Point on Selection, Vertex / End will be automatically unselected). For more information, see Define points.
Open the file EnterPoints.3dr in order to practice. Make sure all the objects from the tree explorer are visible and open the command Point.
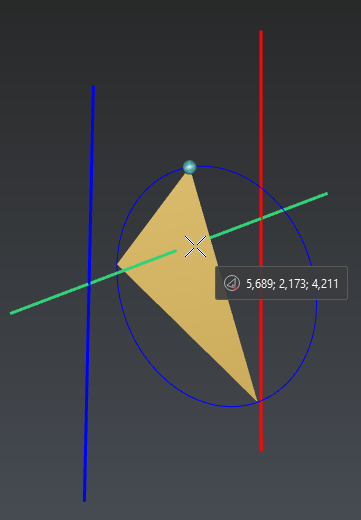
Therefore, when the software is waiting for a point, you will see, next to the cursor, the coordinates of the selected point and an icon showing which snapping it is. If the point is not just behind the cursor, you will also see a small ball in order to locate the point. For example, in this following picture the current point is (5.689, -2.173, 4.211) and is located on one vertex of the triangle.
 When the software is waiting for an input point, a preview is made in real time in order to see where the point will be clicked
Point on Selection
With this option, you can click on a point on the object behind the cursor exactly where the cursor is. Click on a point on the triangle: you will see that the created point is exactly behind the cursor and on the triangle. Then try to click on a polyline, the green one for example, the point will be also located exactly on the line.
Vertex End
With this option, you can click on an existing point. It means that if you click on a triangle, the point will be created on a vertex. If you click on a line, it will be located on an extremity, etc. Try to click on a point on the triangle; the created point will be on the nearest vertex. Then click on a polyline; the point will be located on the nearest extremity.
Nearest 3D projection
This option means that the point is projected in 3D on the nearest entity. "3D projection" means the shortest distance between a point and a 3D object.
Middle Center
With this option, you can click on the middle of a segment or the center of a geometric feature. Try to click on a point on a segment: the created point will be the middle of the segment. Then, click on a point on the circle; the created point will be the center of this circle.
Intersection
This option means that the clicked point is the intersection between two lines (in 2D or 3D). The intersection will be computed according to the zoom factor. This means that if there is no real intersection between two lines and if you make a zoom to focus on the intersection area to see the small gap between lines, the system will not accept to make the intersection. However, if you zoom out, the intersection will be clicked (and the point will be equidistant from the two lines). The minimum distance between the two lines will be given in a warning message and the system will sound as a bell to tell you that there is no real 3D intersection between the lines.
Select only the option Intersection, then zoom considerably on the intersection between the green and the blue segment, and then try to click on this intersection. The point will not be created as the distance between the two lines is quite large compared to the screen size. Now, zoom out and try again. This time, the intersection will be created as the distance is now very small compared to the screen size (and the clicked point is equidistant from the two lines). However, a warning message appears in order to explain that there is no real intersection between the two segments (and the given distance is the smallest distance between the two segments).
Now, try again clicking on the intersection between the green and the red segment. The intersection will be clicked whatever the zoom is, as there is a real intersection between these two lines, and you will not have a warning message.
XYZ
This option allows entering a point without projection on geometry. You can enter manually (or with copy/paste) an XYZ coordinate. You must enter in the field one, two or three values separated by a space or a semicolon:
Enter "1 2 3". The software will understand X=1; Y=2 and Z=3.
Enter now "X1.1 Y2.2". The software will understand X=1.1; Y=2.2 and Z=3. As the third coordinate is missing, the Z coordinate will keep the previous value.
Enter "DX3". The software will understand X=4.1; Y= 2.2; Z= 3.0 because the previous value was 1.1 and DX3 means "add 3 to X"; the Y and Z coordinates will keep the previous values.
However, you can also click on points directly in the 3D scene, even if there is no object behind the mouse. The point will be created in a plane parallel to the screen plane (impossible to control the depth).
Surveying Target
This option only works on point clouds having intensity values.
 Compatible targets
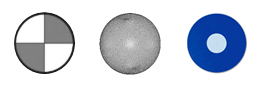
If your point cloud contains some surveying targets (black and white, spherical or blue and white) like one of the pictures above, you can click on the center directly. For example, select the option Surveying Target and With checkered pattern, enter 0.15 as the diameter target and then click on a point on the target located on the point cloud Target 5 – Checkered pattern. The created point will be the perfect center of the target. Use the Inspection representation in order to better detect targets in the cloud (for targets with checkered pattern and for circular targets).
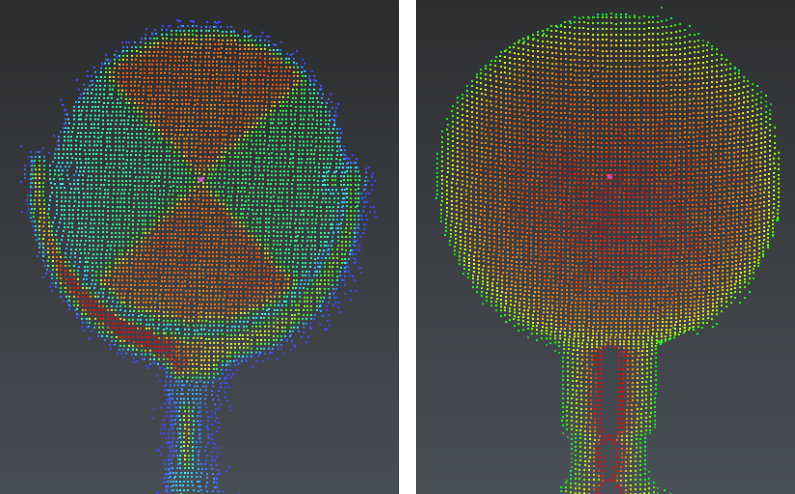 With the "Surveying target" option, you can click automatically and precisely the target center (with checkered pattern on the left, spherical on the right)
Highest Point
This option only works on point clouds.
With this option, you can click on the highest point of the cloud above a seed point. Try to click a point on a target: the created point will be at the highest point above the clicked point.
Lowest Point
This option only works on point clouds.
With this option, you can click on the lowest point of the cloud below a seed point. Try to click a point on a target: the created point will be at the lowest point below the clicked point.
Ground Point
This option only works on point clouds.
With this option, you can click on a point above or below the seed point at the ground level.
White Line
This option only works on point clouds having intensity values.
With this option, you can click a point at the axis of white lines thanks to a seed point.
Pole Center
This option only works on point clouds.
With this option, you can compute a point at the intersection between the ground and the axis of cylindrical vertical poles thanks to a seed point.