The user interface of the Touch mode is divided in two workspaces:
the homepage, the default workspace when opening the Touch mode,
the workflow workspace, available when a workflow is in progress.
Homepage
|
|
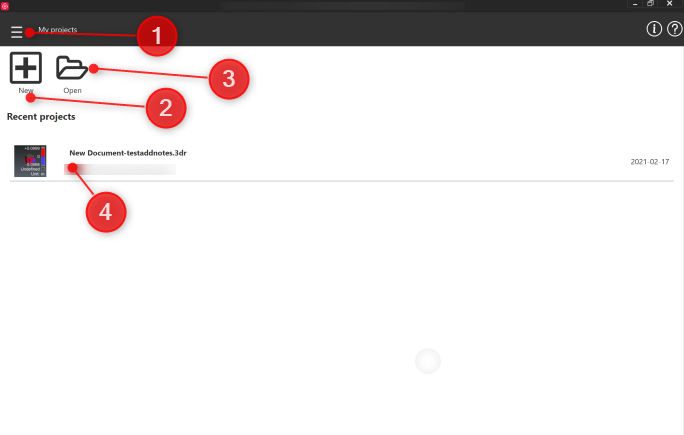
Main menu:
Switch to Desktop: to return to desktop user interface.
Settings: to edit touch settings. Global settings stay editable from desktop interface.
Exit: to close the software.
New: to start a new workflow. It opens Get Started page.
Open: to open a 3dr file which contains a workflow project.
Recent projects: a list of all the recent files.
|
Workflow workspace
|
|
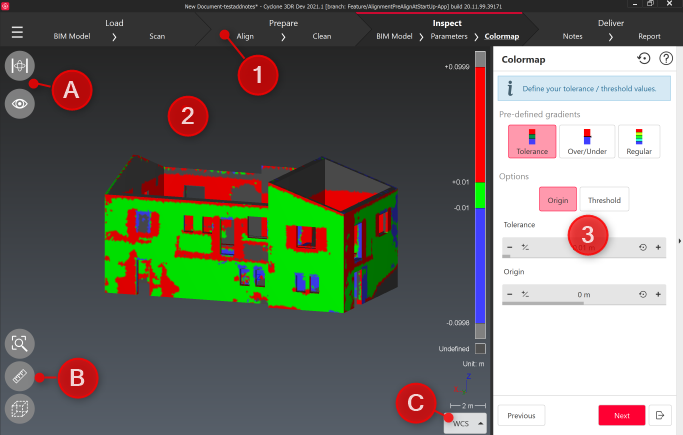
The top bar
Main menu: same options as Homepage.
Workflow ribbon: it represents the overall steps of the current workflow. Each steps acts as a button, allowing to easily switch back to other steps.
Navigating through the ribbon
As steps are often linked to the previous ones, it may not be possible to directly jump to a further step from the ribbon.
When switching to another step, the application will first try to validate the current one results if any.
The 3D Scene
Camera and visibility toolbars:
Quick access toolbar: it stores the different tools available all along the workflow such as limitbox edition, measurement, etc.
Show/Hide the quick access toolbar
A single tap in the 3D scene toggles the visibility of the toolbar.
UCS selector: to switch between existing user coordinate systems.
The current step dialog displays the UI of the current step of the workflow.
Next and Previous buttons allow navigating through the workflow.
Next and Previous buttons always validate the current step results.
The Exit button cancels the current step, closes the document and goes back to the homepage.
|