Options panel

Specific options are available in Options panel when you have selected an image, a scene or a table.

images/download/attachments/218235236/image2018-9-5_15-58-55.png

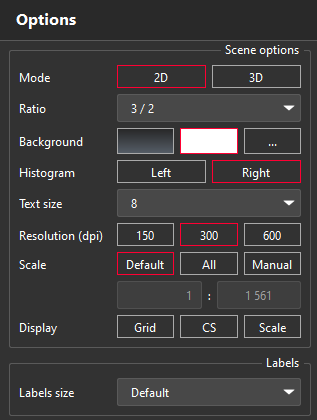
2D scene options:

  1. Mode: in 3D mode, a 3D PDF will be inserted into the report instead of a 2D image. Please, refer to 3D Scene options below.

  2. Ratio: choose the image ratio (3/4, 1/1, 3/2, 7/4, 2/1 or 5/2). For instance, you can increase a scene ratio to avoid starting another page.

  3. Background: by default, the background color is white. You can choose the same background color as the one of the 3DR application or a specific color with the "..." button.

  4. Histogram: choose to display the histogram on the left or on the right side.

  5. Text size: the size has to be given in "point".

  6. Resolution: the higher the resolution is, the better the image quality will be. Note the image size on disk will increase by a 4 factor between each resolution proposed.

  7. Scale:

    1. Default: the viewset won't be modified (neither the targeted object nor the scale)

    2. All: the scale will be automatically set to display the whole object (the direction of view is preserved).

    3. Manual: adjust manually the scale (the point of view is preserved).

  8. Display:

    1. choose whether you want or not a 2D grid inside the view (if available).

    2. choose whether you want or not the coordinate system XYZ inside the view.

    3. choose whether you want or not the scale bar inside the view.

  9. Labels size:

    1. The size of labels allow you to show few or all information. Default will use the same size of labels as the one set in the document.

images/download/attachments/218235236/image2018-9-5_16-2-5.png

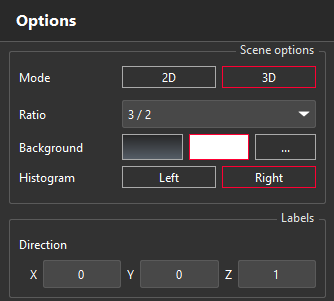
Additional options for 3D Scenes:

  1. Labels:

    1. Direction: define the direction vector of attachment lines.

      Note

      Labels are reduced to their names in 3D PDF. Use a labels table to share your results.

  2. Isoline texts:

    1. Distance: define the distance, in object unit, between texts along isolines.

    2. Color: define their text color.

Note

Some objects cannot be exported to 3D PDF: refer to Export to 3D PDF.

images/download/attachments/218235236/imageOptionsEN.png

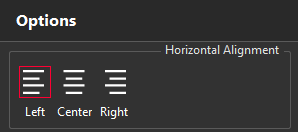
Image options:

  1. Horizontal Alignment: choose left, center or right to align the cell content.

The cell width has to be defined in the Template View (drag and drop a vertical border).

images/download/attachments/218235236/tableOptions.png

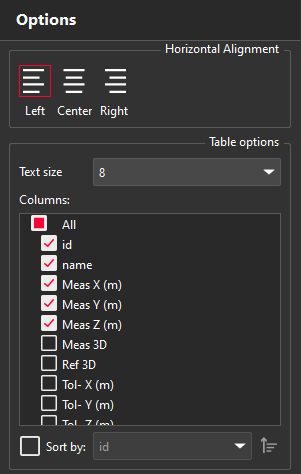
Table options:

  1. Horizontal Alignment: choose left, center or right to align the table.

  2. Table options:

    1. Text size: set the text height in point unit.

    2. Columns: select the columns to display.

You can sort out:

  • the columns within the template view (drag and drop).

  • the rows in an increasing or decreasing way defining a column.

images/download/attachments/218235236/qa2022_n0573.png

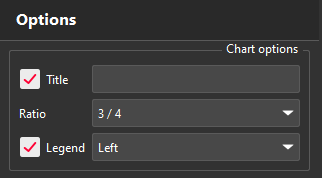
Pie chart options:

  1. Title: optionally add a title.

  2. Ratio: choose the pie chart ratio (3/4, 1/1, 3/2, 7/4, 2/1 or 5/2). For instance, you can increase a the ratio to avoid starting another page.

  3. Legend position: optionally add a legend and define its location.