Exercise: Texture a mesh with spherical images and edit mask
Open the file Aqueduct.3dr.
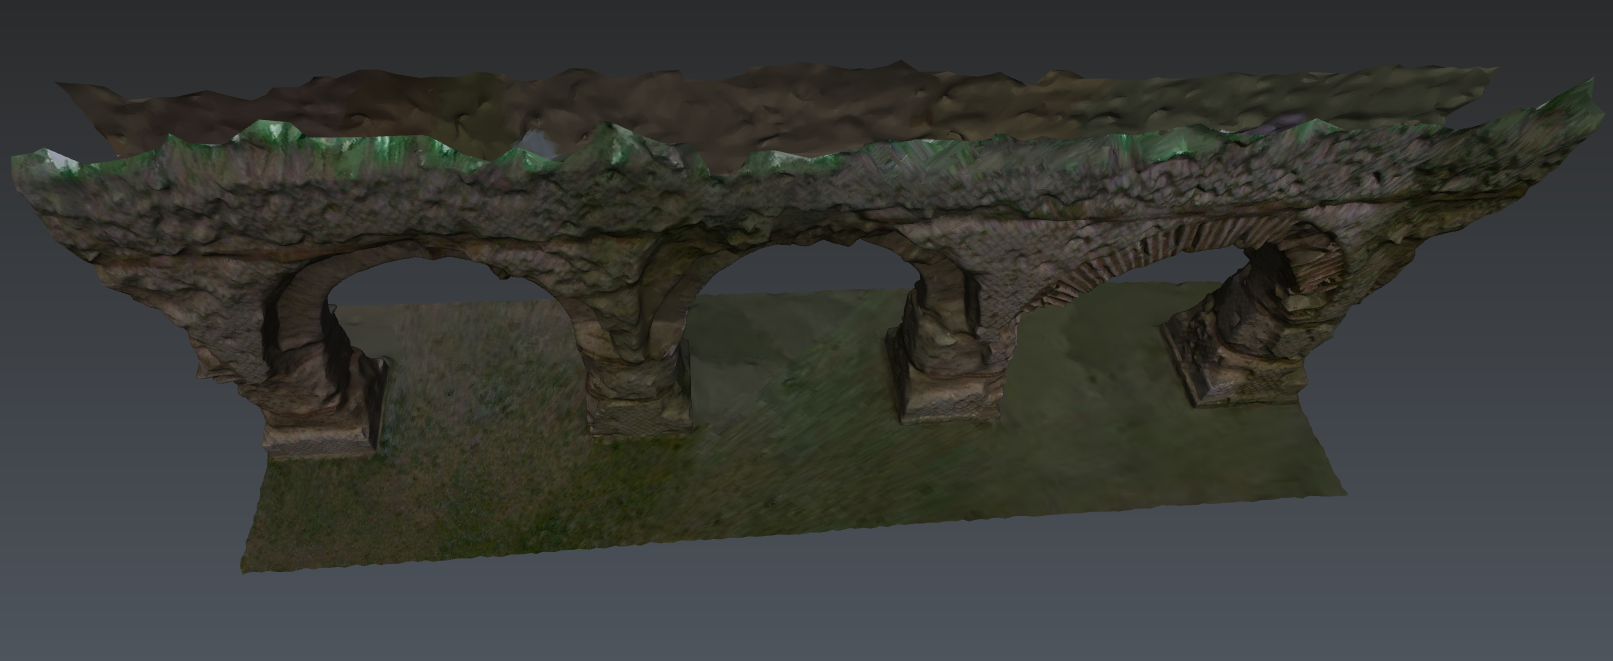
This sample was measured by a Leica BLK2Go, then imported in Cyclone 3DR where a mesh was created.
The image positions can be displayed using: Shift + S or the Show / Hide positions icon next to the top right quick tools bar.
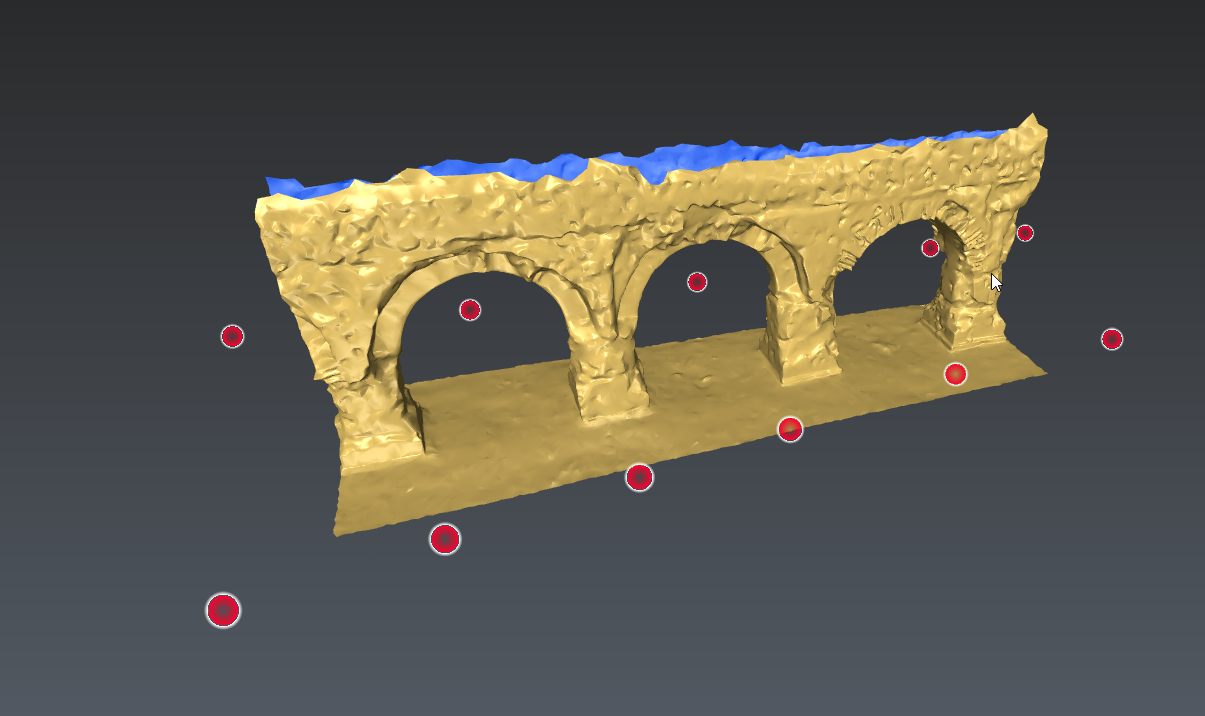 The aqueduct to texture with its image positions
Smart Texture
In the Exercise: Texture a mesh with reference points, the texturing was performed by Standard Texture. Now, we are going to use Smart Texture. This command is almost similar in its use but technically different.
Standard Texture provides a dynamic texture: image areas are selected to be projected onto a mesh. If the mesh is modified, for instance by a smoothing, the areas will continue to be projected onto the mesh. That is why, you can also modify the pairing between images and the mesh using Adjust Textures. Note that the original images are fully stored in the mesh object: you can restore them using Extract Texture.
Smart Texture provides a static texture: the texture is painted on each face. Any mesh modification, done later, will affect the texturing. Thus Adjust Textures is only suitable to remove the texture locally, for instance to replace the texture by another one (Texture from Clouds, Texture Material or Standard Texture). Note that the mesh will store a texturing map (not the original images).
Beside these differences, Smart Texture can be used with more images at the same time and supports masks. For instance, when using images with blank areas (spherical images), the corresponding areas will no longer be used.
Select all images and the mesh, then launch Smart Texture. Set the Pixel Size to 5 mm, check Optimize the mesh and run the computation.
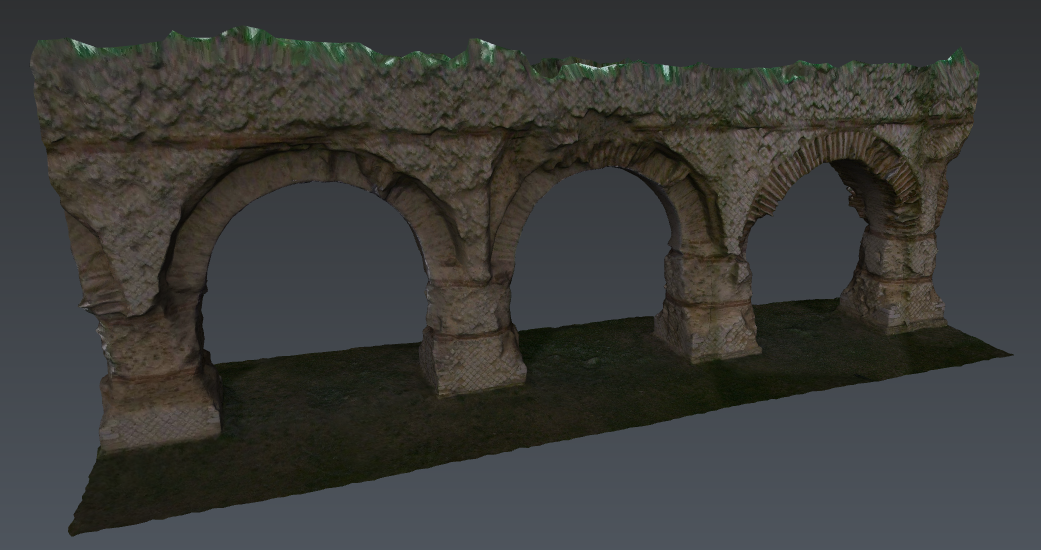 Smart Texture result
Smart or Standard Texture - Adjustments
If some areas are still incorrect or missing, it is possible to remove the texture locally using Adjust Textures. Select the mesh and run Adjust Textures. Choose the Textures display mode and the Remove All option. Then, remove a small area.
Now, you can complete the texture using another images or the real color of the cloud. Refer to Exercise: Texture a building mesh using several textures.
 Standard Texture: one color = one image
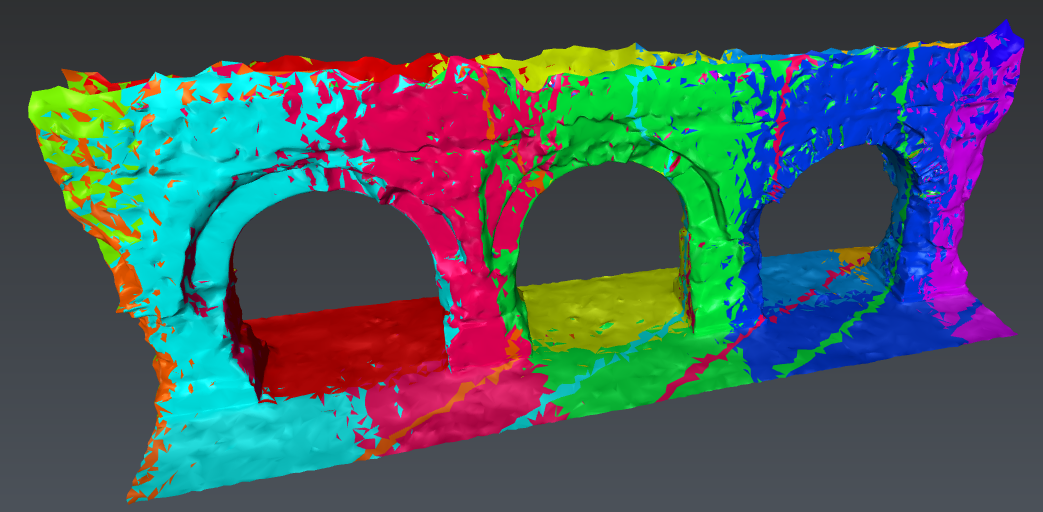
 Smart Texture: one color=one texturing map
Edit Mask
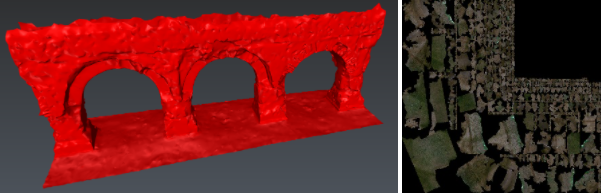
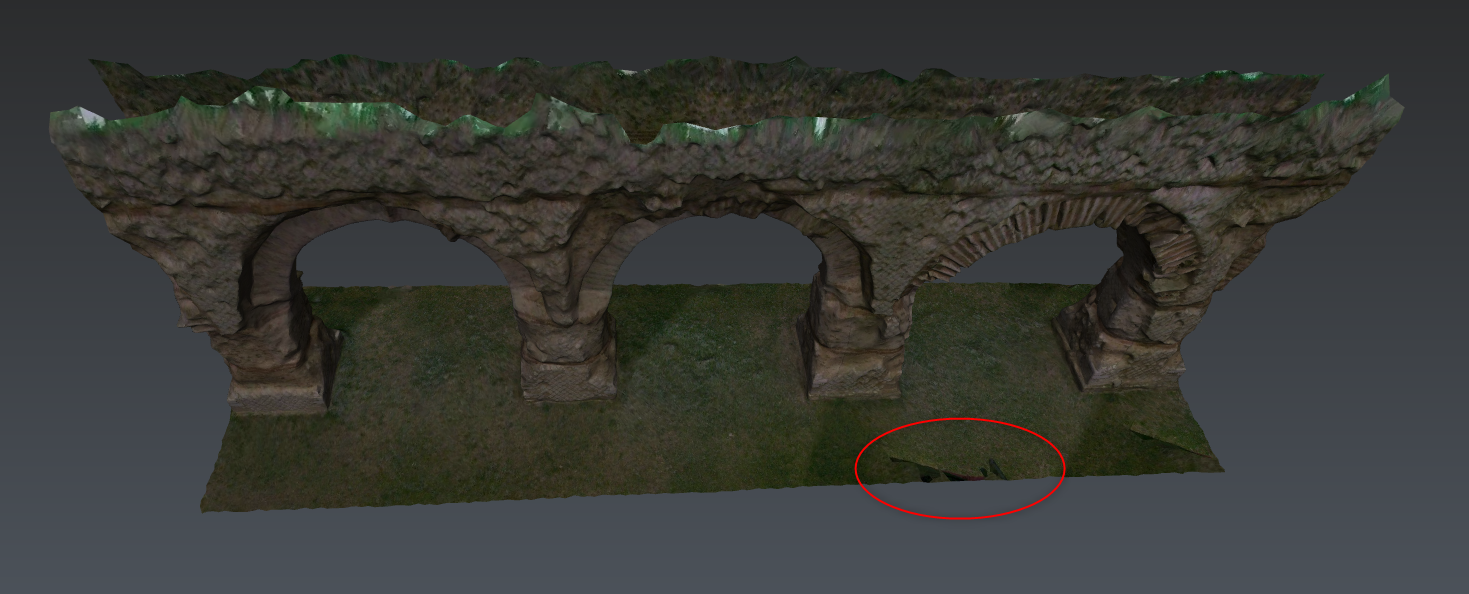 Some inappropriate texturing
However, it is possible to prevent directly smart texturing from using inappropriate parts of images (see the above image): it is the purpose of masks. To continue, undo what you have done with Adjust Textures.
When importing images, a default mask is automatically generated in blank areas. If the automatic mask is not suitable, you can clear or modify it using Clear Mask or Edit Mask respectively.
Open the Image Preview of Spherical #8, #9 and #10. You can toggle between the image and its mask preview. You can see that the current mask doesn't hide completely the arm of the person carrying the BLK2Go.
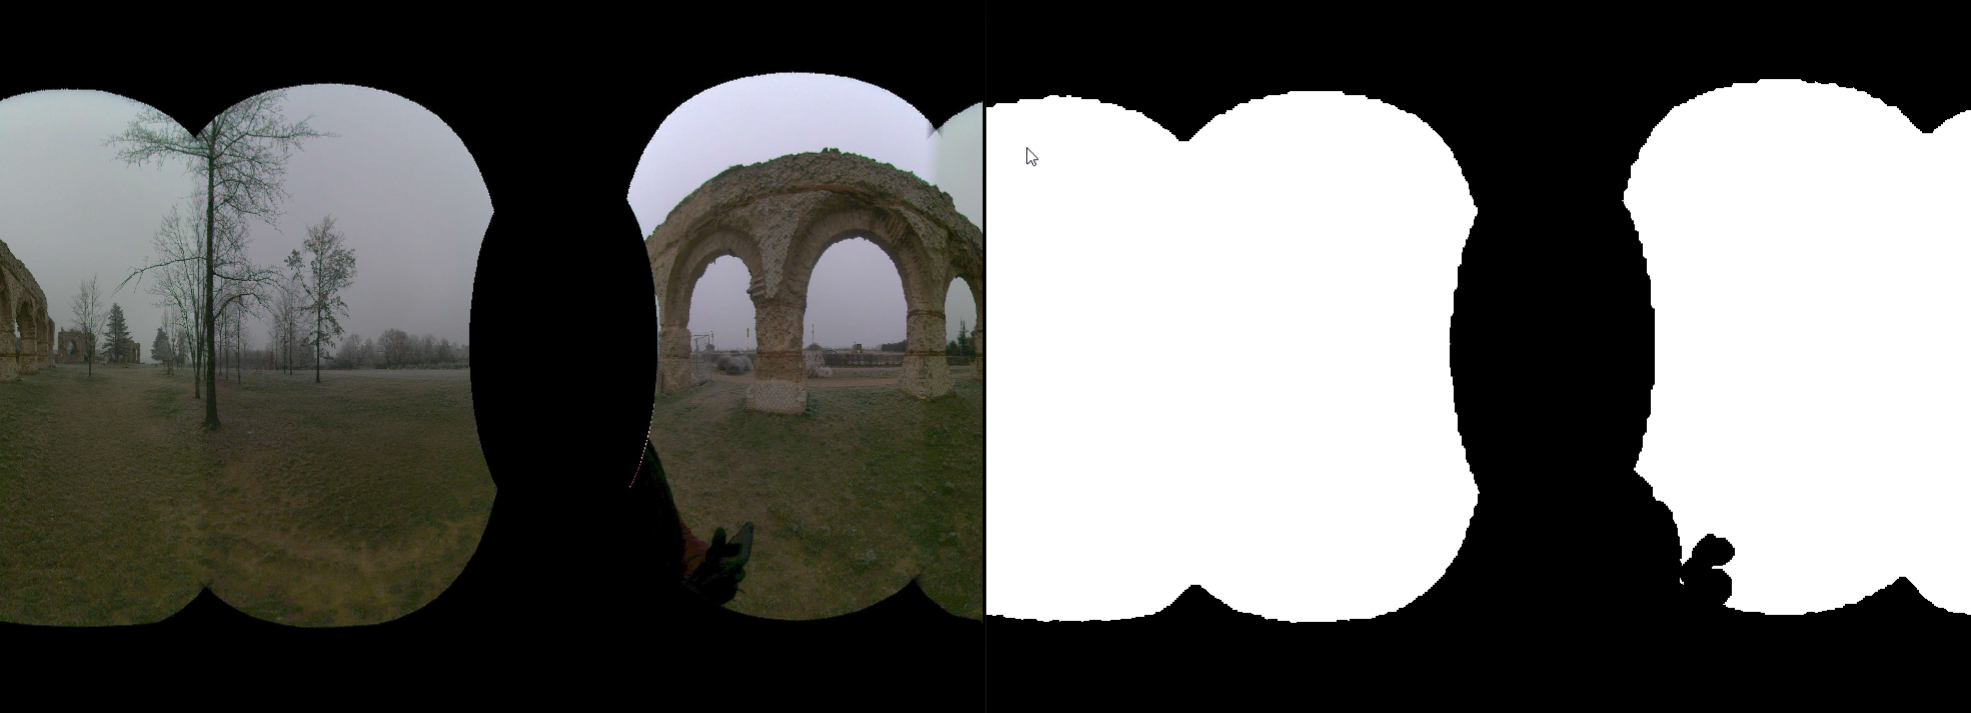 Image Preview
Exit the preview, select only the images #8, #9 and #10, then launch Edit Mask.
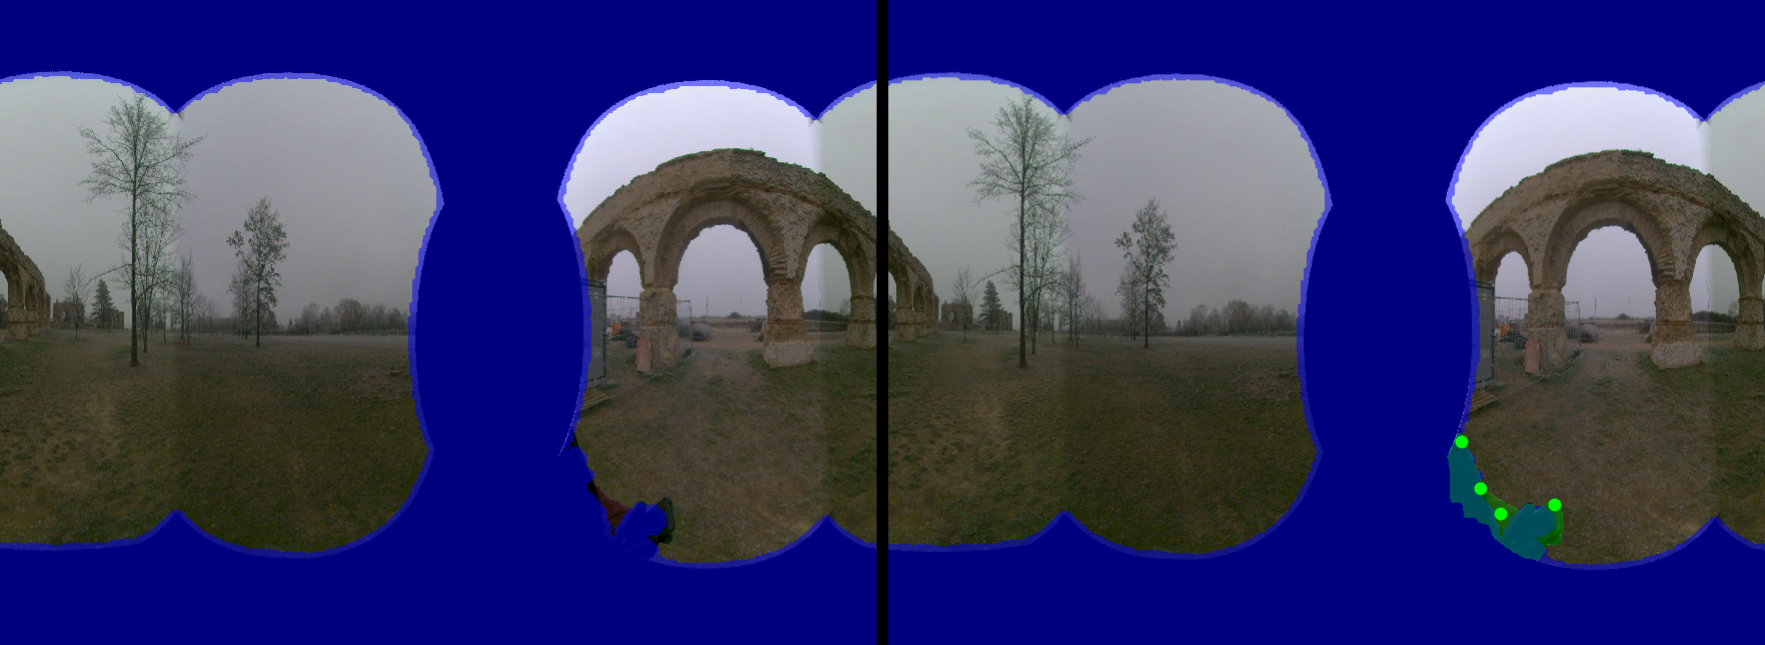
On image #8, use the brush (or other manual tools like free hand and polygon) to cover the hand holding the phone:
![]() Edit Mask - Add masks manually
Edit Mask - Add masks manually
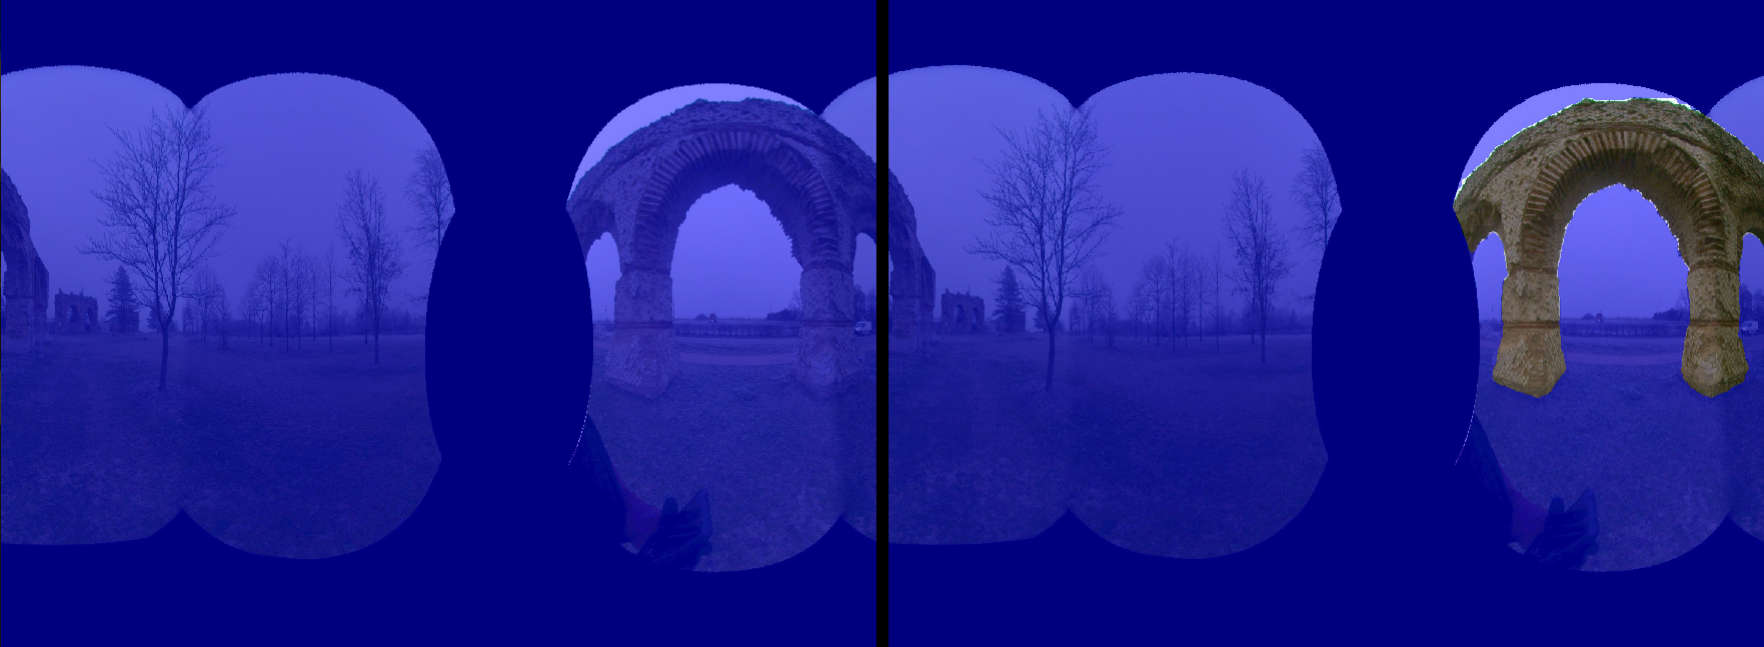
On image #9, use the automatic tool to cover the hand. To use the automatic tool, you have to click on the part you want to add to your selection. You can use SHIFT + Click to add points on objects you don't want to be added to the selection. Once you are satisfied with your selection you can press ENTER to validate it.
 Edit Mask - Add masks with AI
You can also combine all the tools at the same time to adapt to your needs.
If you rather want to texture only the aqueduct, you can apply the following strategy on all images (described only for image #10):
Use the free hand tool to select everything.
Then use the automatic tool and switch to Eraser mode.
Click on the aqueduct to select it.
Inflate or deflate the selected zone.
Press enter to validate your selection.
Now, everything is masked except the aqueduct.
 Edit Mask - Reverse strategy
Now, use Remove Texture(s) to remove previous texturing, select only the images #8, #9 and #10 and the mesh, then launch Smart Texture. The hand holding the phone is no longer visible on the ground:
 Smart texture with images 8, 9 10 - With customized masks