Texture Mapping
Introduction
This module allows you to map a photographic picture of an object on the corresponding 3D model. According to the data you have, there are two ways to apply the image or texture onto the 3D model.
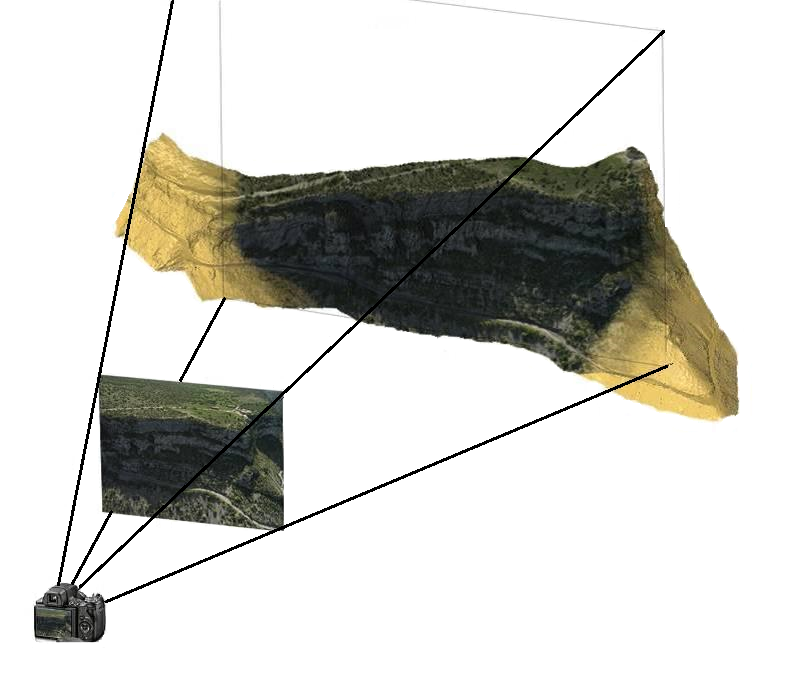
Reference points: The position, the orientation and the optical parameters of the camera are determined by some point couples. Each couple is made of one point on the 3D surface and the corresponding point on the image that you select by simply clicking (3 to 5 points are sufficient).
Camera definition: You can fill in the photogrammetric parameters (origin and orientation of the camera, internal camera geometry, lens distortion...). You will get a very accurate mapping of the texture onto the 3D model.
In the texturing module, you can:
Preserve the projection data so that the texture mapping can be replayed if the 3D model changes.
Use more than one image to texture one 3D object. The software automatically chooses the right image according to the camera orientation and zoom factor.
Export the 3D textured models to other applications.
Export ortho-images with the command Extract OrthoImage.
Exercise overview
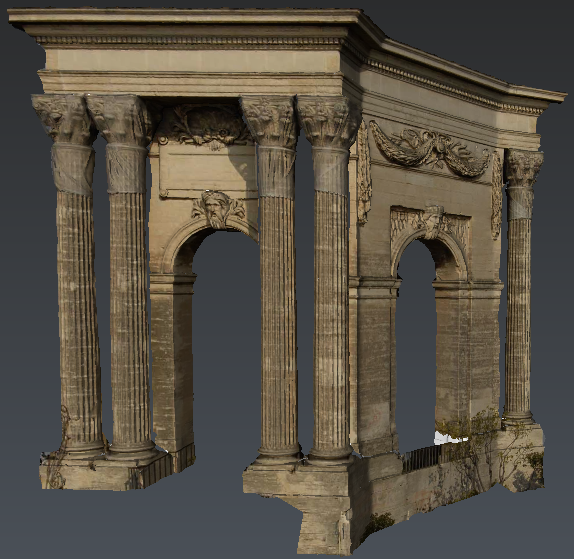
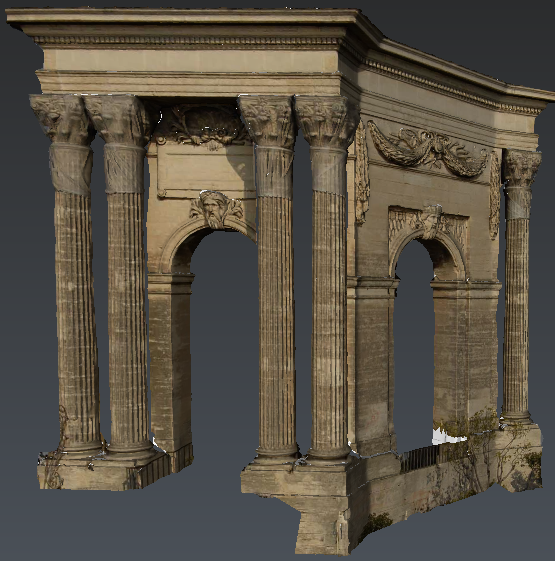
In this exercise, we will see how to map a 2D picture on a 3D mesh model by reference points method.
The file used in this tutorial is MonumentBeforeTexture.3dr
Applying a texture to a model
Import the image roman water tower.jpg which is in the same folder. Select this image and go to Estimate Pose.
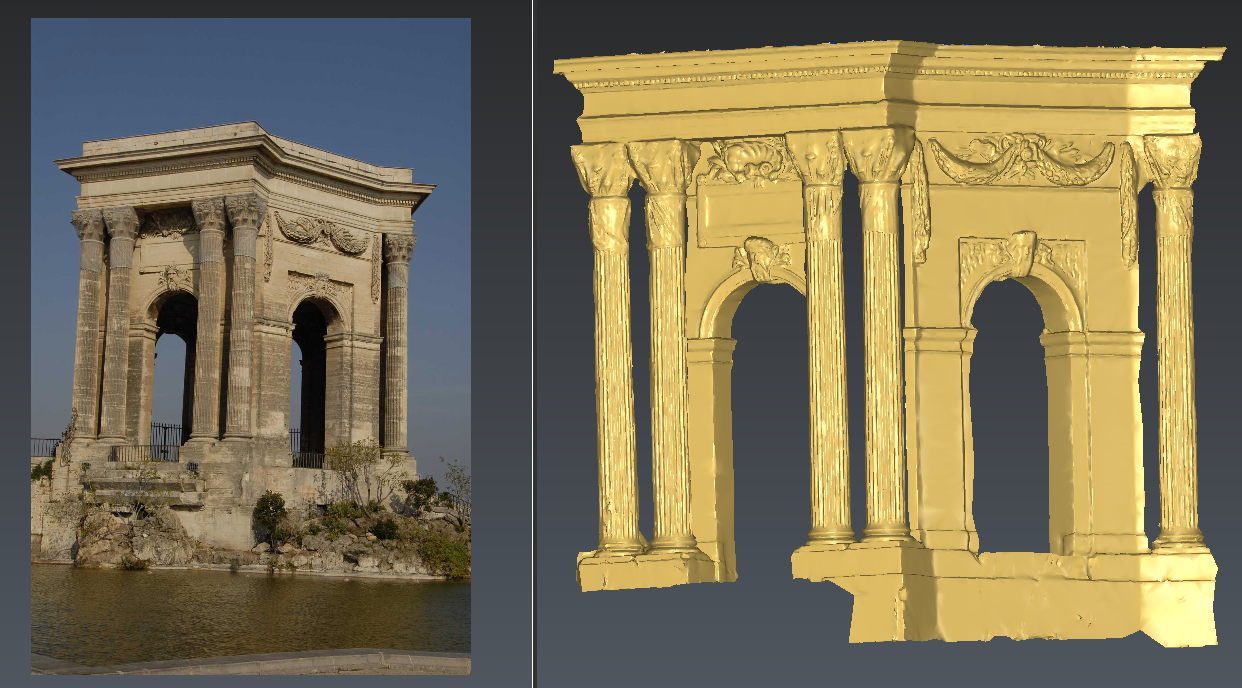 Figure 1: Split views
Define directly your pairs of points.
The software waits for 2 points: one on the picture and one on the 3D model, but the order is indifferent. We advise to choose landmarks such as the nose of the statue to make the point coupling and the projection easier and more accurate. The landmarks should also be scattered all over the model.
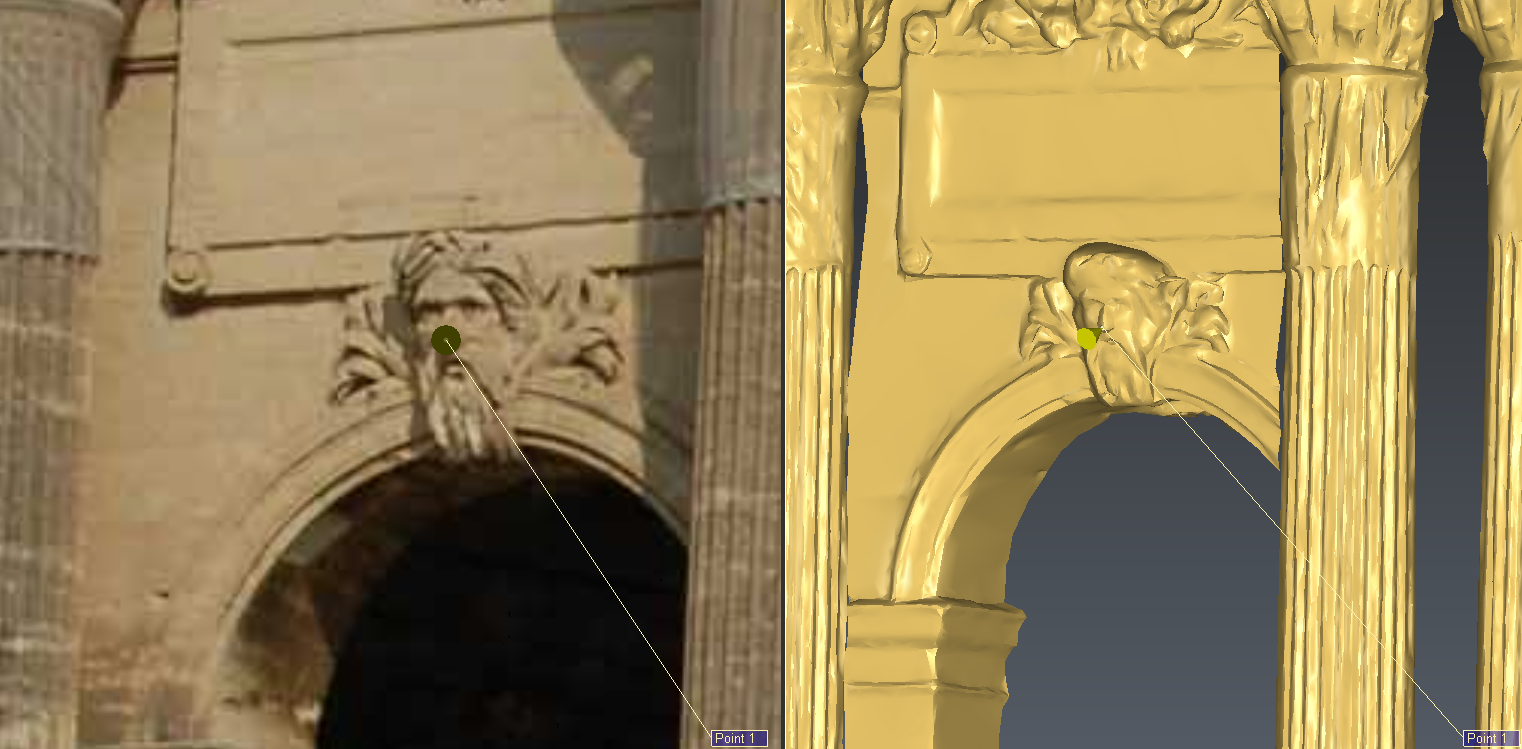 Figure 2: Select a point on the image and select the corresponding one on the model
You can:
move and zoom on the image.
press the DEL or Backspace key to remove the last point.
As soon as you have 4 couples of points, external and internal parameters are computed: you will see the location of the camera in the 3D scene. You may add additional couples if you need to improve or correct the texture mapping especially in case of high image distortion.
Select for instance 6 reference points.
# 1 nose of the left statue
# 2 nose of the right statue
# 3 a left lower part (lower angle)
# 4 a left upper part (upper angle)
# 5 a right lower part (lower angle)
# 6 a right upper part (upper angle)
 Figure 3: Enter six couples of points on the image and on the model
Click the Preview button to take its view point and lock the camera position (or switch to Panorama mode) to stay on it. After the preview, you can continue to enter other points couples.
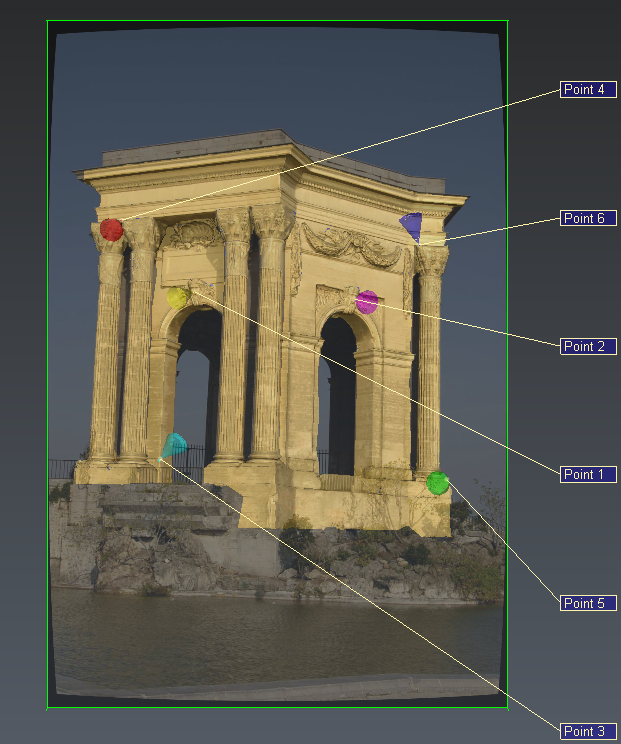 Figure 4: Preview
You can export your reference point list if you want to save and use it later. Here, you can use the file TextureRefPoint.txt.
Select the image and the mesh, then go to Texture from Images. Apply the texture on the model by clicking on Preview. You can test 3 types of projection:
|
|
|
|
|
Invisible parts The picture is projected on all triangles that are in the frame of the camera (watch out for potential blurry effects). |
At least one visible vertex The picture is projected only on the triangles having at least one vertex that is visible from the camera point of view. |
Fully visible triangles The picture is projected only on the triangles that are visible from the camera point of view. “Visible” means that the 3 triangle vertices are all visible. |

Finally, you can save or export in OBJ format the textured mesh model.