Exercise: Improve global aspect and edges
Usually, you want to obtain a smooth mesh in flat or curved parts, but with the sharpest edges possible. In this exercise, you will see how to remove noisy parts, how to smooth the mesh and how to add sharp edges.
Open the file Smoothing&Edges.3dr.
Local smoothing a smoothed fictive line
Select the mesh Facade 1 and go to Replace a Part. Enable both options Add new points inside hole and Curvature filling. Then, draw a contour around an aberrant zone like in the next picture. When you release the button, the surrounded area will be automatically replaced by a new smoothed one. You can repeat this on several areas in order to remove all small defects.
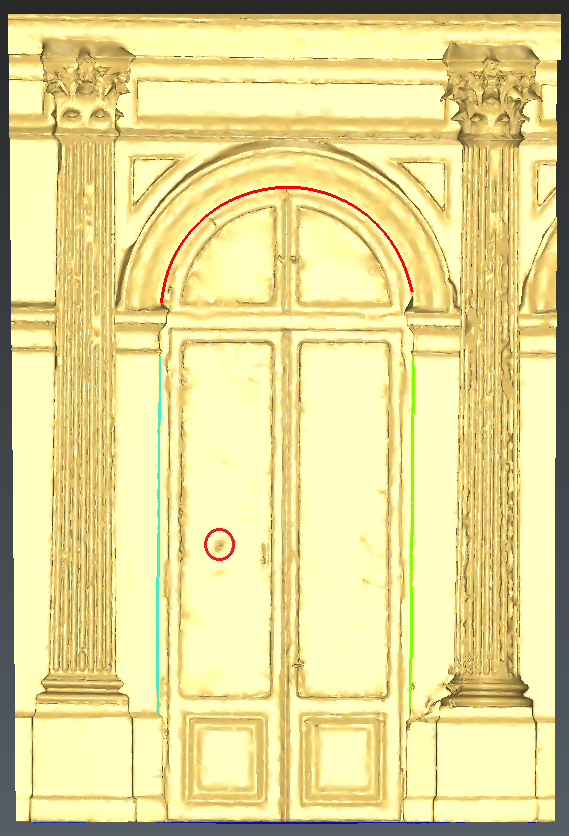 Replace a part of a mesh
Click OK to validate the correction.
Global smoothing
Once all aberrant zones are removed, we can apply a global smoothing in order to make the mesh less faceted, spiky and noisy. Select the mesh and go to Global Smoothing. There are two methods for smoothing:
Smooth noise: choose this option if you need a very smooth mesh.
Keep Details: keep this option to preserve details.
In both cases you can control the smoothing deformation, and preserve the accuracy using Control Deviation option.
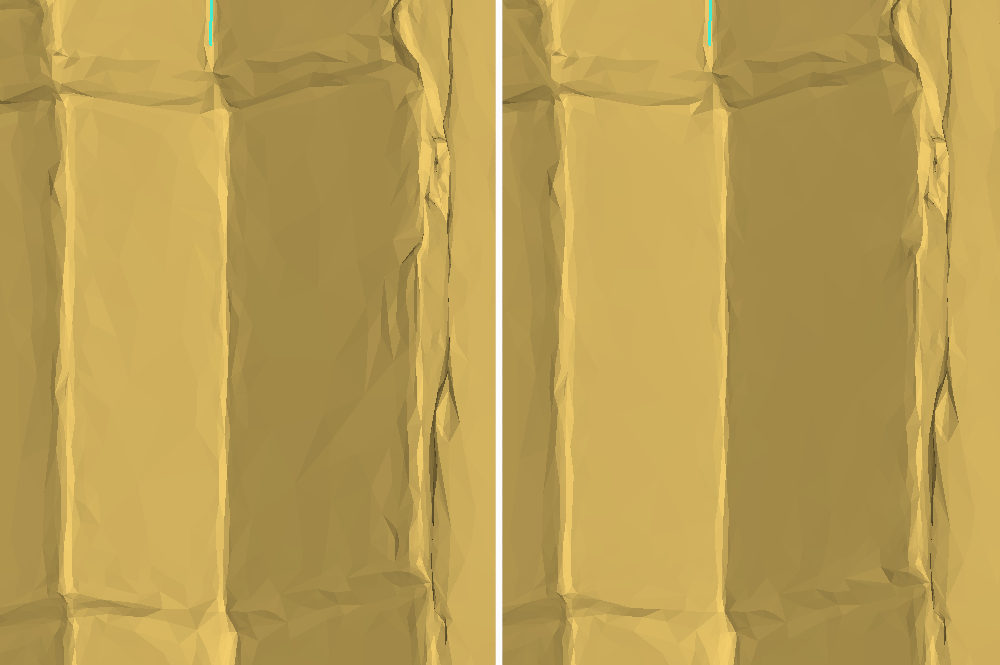
Choose Smooth noise, do not select Control Deviation and set the Intensity to Medium, in the middle of the slider. Then click Preview. You can see that the global shape looks smoother but all sharp edges have been rounded.
Now select the option Control Deviation and set the Deviation to 5 millimeters and the Smoothing intensity to High. Then click Preview. With this option, we control the deformation; it means that the maximum distance between the two meshes (before / after) will be 5 millimeters. The global shape has been improved and compared to the previous smoothing, sharp edges are less rounded.
 without deviation control (on the left); with deviation control (on the right)
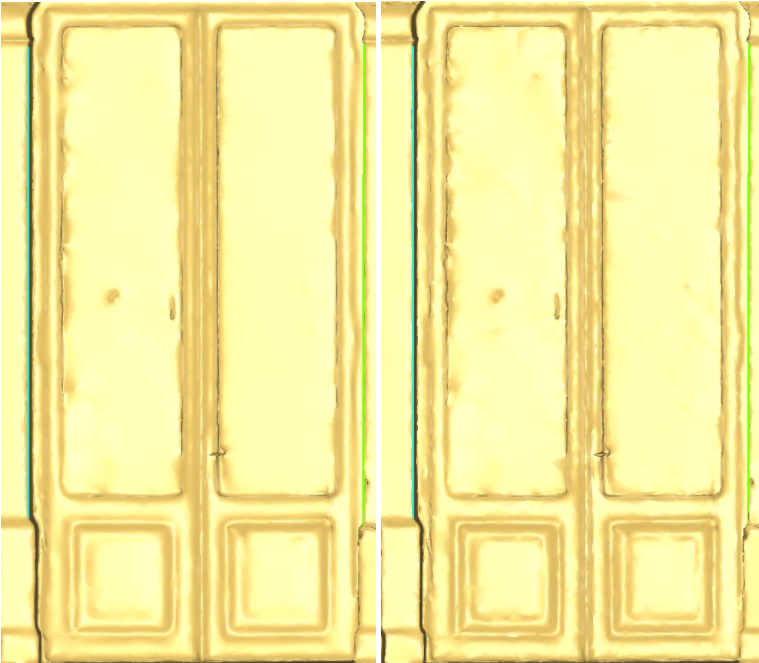
Local Smoothing
You may need to smooth only specific parts of your model. For this, you can choose to work on small parts of the model. Select the mesh and go to Local Smoothing. In this command, the cursor works as a brush that smoothes what is under it. You can change the Brush size and Smooth Intensity according to your need.
 Before Local Smoothing (on the left); After Local Smoothing (on the right)
Re-create sharp edges
In the software, you can recreate sharp edges with a dedicated command. You must first create polylines corresponding to the sharp edges you want to add, and then the software modifies the mesh automatically. There are several tools to create these polylines, they are all described in the section Sections and Polylines.
In the contour group, you will find three polylines:
Edge Vault obtained with the command Single Breaking Line,
Edge Corner 1 obtained with the command Region Grow Plane and Intersection,
Edge Corner 2 obtained with the command Region Grow Plane and Intersection.
Select the mesh and the three polylines and go to Sharp Edges. The parameter Cleaning Distance will delimitate the cleaning area around the polylines, then all the triangles in this area will be changed. If the distance is too small or too big, the result will not be correct. Enter 0.13 m for Cleaning Distance.
Press the Preview button. The 3 sharp edges will appear on the mesh. Click OK to validate. Feel free to enter different values in order to see the difference.