Exercise: Create a BIM inspection report
Import the data
Create a new document and import the IFC file site.ifc.
Type "Wall" in the Filter field, unfold the found folders, do a right click on the "Wall" node and choose Load only selection.
Finally, validate the edition: you have sub-selected components among a BIM project. Note the BIM project still contains the whole data.
The BIM model can be edited later through the contextual menu (Edit).
Then import the scan site_aligned.e57 in meter (only the cloud is necessary).
This scan is already aligned with the BIM model, so no further action is required.
Inspect
Select the cloud and the BIM and perform an inspection between a cloud and a BIM (Cloud vs).
Apply colors on reference (site BIM), set the Resolution to 25cm, check Max distance to 10 cm and Consider surface orientation. Press Preview to run the analysis.
Click Edit color and choose the Presets Tolerance. Define the tolerances (3 cm and -3 cm) and validate.
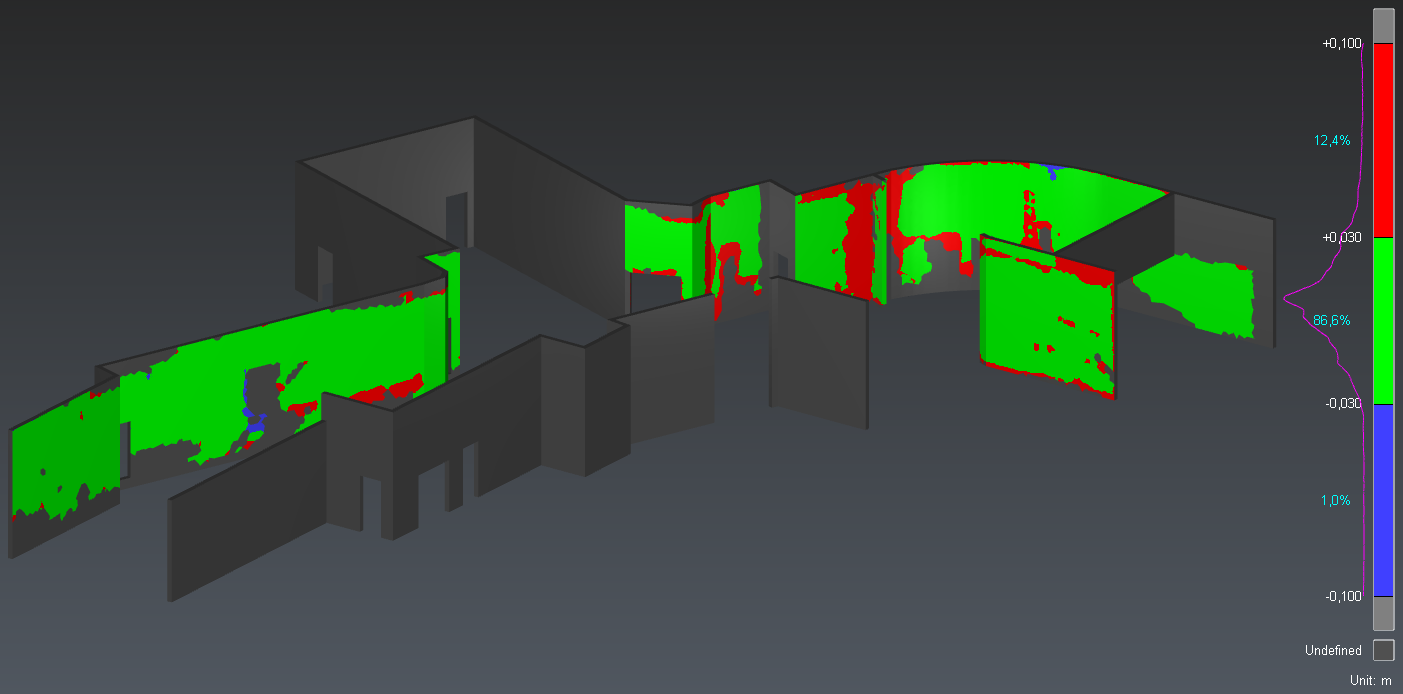 BIM inspection
Annotate
Select the inspected mesh and launch Inspection Notes BCF.
Identify a blue or red area and add a note on it thanks to the toolbar at the bottom center of the scene.
You can describe the issue (Title, Description) and set its Priority. Then, you can add deviation labels and save viewsets.
Add a note on another wall defect. Note the wall ID (BIM Component field), stored in the source file, is automatically stored in the note.
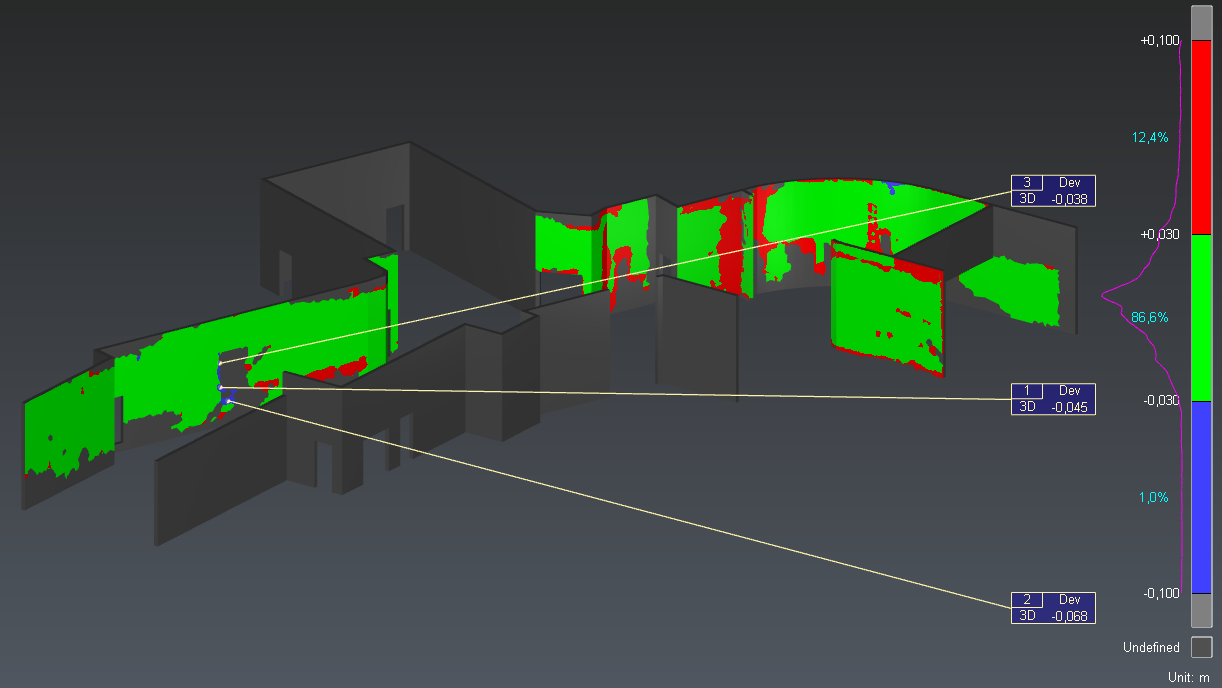 Inspected BIM and labels assigned to an issue
Optionally, create another notes. Validate with OK.
These notes can also be exported to a BCF file.
Reporting
Open the report editor: a chapter called BIM Inspection gathers all inspection notes. Click ToPDF to generate the report.
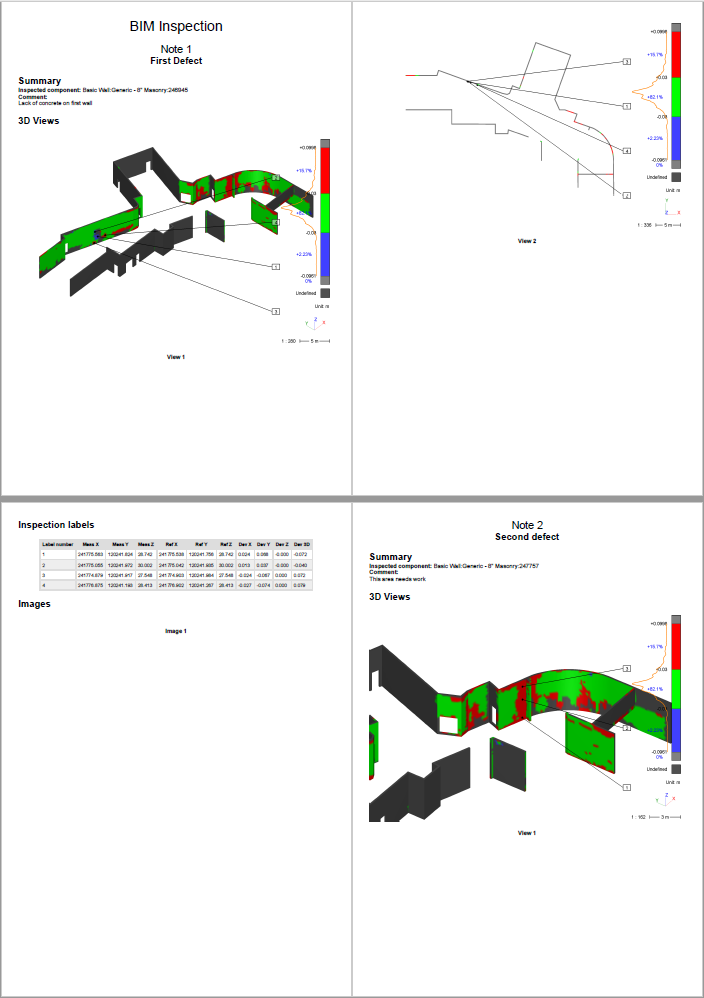 Inspection notes report