Stockpile
![]()
This command enables you to compute stockpile volumes by drawing the contour of each one on a cloud.
Select one or several clouds (or one Cloudworx cloud) and launch the command to start a new project. A single project is allowed per document: select a stockpile project to edit.
Warning
It is highly recommended to handle the command results from its interface. Some issues may happen by removing data from the treeview.
The command walks you through a complete workflow using 3 dialog boxes:
Stockpile project manager
This is the first dialog that gives you access to:
the project parameters
an overview of existing measurements
the possibility to launch a new measurement
Define the Project name.
Modify, if necessary, the units of the results:
Length unit
Area unit
Volume unit
Click on New Stockpile to define stockpile characteristics and draw a new stockpile contour (refer to sections Stockpile definition and Stockpile computation).
You can display labels showing the "Cut volume" by clicking on the label icons
 :
:All
None
Stockpile by stockpile
Unfold each stockpile view to visualize its characteristics and volumes by clicking on its colored stockpile icons
 or on its stockpile name.
Click:
 to zoom on the stockpile.
 to remove the stockpile.
 to edit the stockpile characteristics (refer to section Stockpile definition).
 to modify volume computation (refer to section Stockpile computation).
Click OK to validate or Cancel to exit.
Stockpile definition
Define the color of the stockpile (or keep a random color).
Define the Stockpile name. Two stockpiles can't share the same name.
You can modify or add your own characteristics. Note that characteristics are shared with all stockpiles. Click:
 To add a new characteristic
 To remove a characteristic


 To sort the characteristics
Fill the Value for each characteristic. Empty fields are allowed.
Click OK to start the stockpile computation (refer to section Stockpile computation).
Stockpile computation
Click on Draw or Select so as to define the stockpile contour:
Select: select a closed polyline
Draw: click each vertex of the contour, press ENTER to close and validate the contour (press DEL to remove the last point)
Click on RESET to define again the contour
Click on Definition if you need to edit the stockpile definition (refer to section Stockpile Definition).
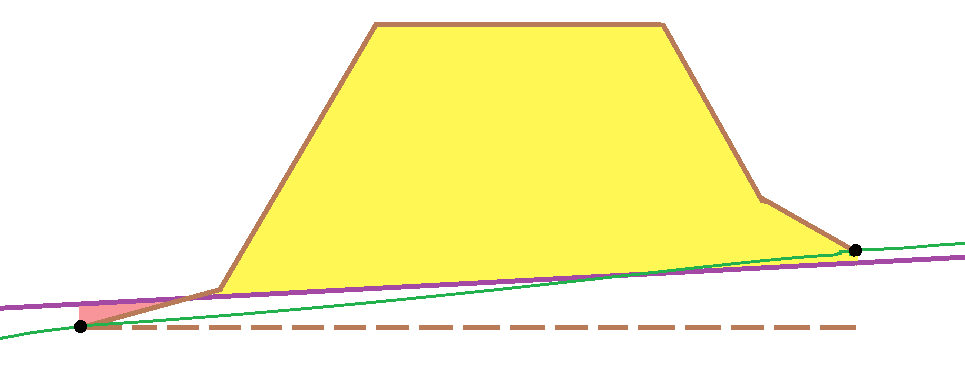
Select a Method to compute the reference mesh ("former ground"):
From contour points: a mesh is computed from the contour (which may be not planar).
Best plane from contours: a planar mesh is computed from the contour points.
Horizontal plane from mean elevation: a horizontal mesh is computed at the average elevation of the contour points.
Horizontal plane from highest point: a horizontal mesh is computed at the highest elevation of the contour points.
Horizontal plane from lowest point: a horizontal mesh is computed at the lowest elevation of the contour points.
Custom plane elevation: a horizontal mesh is computed at the given elevation.
Elevation can give the minimum and maximum elevation of the ground (From contour points), the elevation of the horizontal ground, or let you enter the requested elevation (Custom plane elevation).
Set the Spike elimination cursor to reduce the spikes in case of noisy points above the stockpile.
Click Preview to isolate the stockpile cloud, compute the corresponding mesh and compute volumes.
Modify the output visibility in the scene with the bulbs to verify for instance the meshes.
Click OK, Next to validate and create another stockpile, OK to validate and return to the Stockpile project manager or Cancel to return to the Stockpile project manager without validating the current stockpile measurement.
Tip & Trick
If you need two methods for a single stockpile, you can create two stockpiles to improve the result.
Understanding results
|
|
|
Tip & Trick
A cloud with holes is created to help you construct a DTM of the former ground for instance.
Practise
See Exercise: Create a stockpile project in the Beginners Guide.