Edit Limit Object

images/download/attachments/113546800/CmdEditClippingObject.svg images/download/attachments/113546800/CmdEditClippingObject.svg

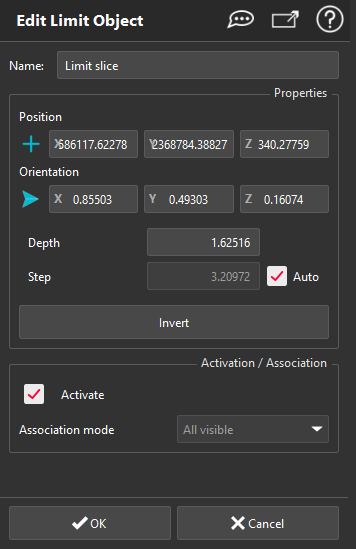
This command allows to modify the limit plane properties, such as:

  • its name

  • its position

  • its orientation

  • the depth of the slice

  • the step of displacement (with the mouse wheel)

  • the scenes where the limit plane is active

  • the components associated with the limit plane (define the behavior of the limit plane)

Double-click on an existing limit plane (in the 3D scene or in the tree) to launch the command.

images/download/attachments/113546800/edit_limit_object.png

  1. Position: the plan moves to the new point position. To do this, click a point in the 3D scene. The coordinates are updated in the XYZ fields. You can also change them manually.

  2. Orientation: the direction will change to the new defined one.

  3. Depth: define the depth of the limit plane (= distance between the first and the second plane).

  4. Step: define the step of each mouse wheel step, or when dragging the plane in the 'mouse tool' mode. By default, 'auto' is checked. The auto mode defines a step according to the zoom factor of the 3D scene.

  5. Activation: as many checkboxes as 3D scenes are displayed, which allows to select the scene(s) in which the limit plane is activated.

  6. Association mode: A limit plane could be associated to all of the components of a scene, or only to a specific list (defined by the user).

Tip & Trick

See also definition and application of limit plane here, as well as all available shortcuts.

Note

A limit plane is always fitting the bounding box of the clipped objects so its center (position) may change when you modify its orientation.

That's why even if you define its position (manually or by click), the resulting position may differ since it has been re-centered to fit the bounding box of the clipped object.