Extract a tunnel mesh
Introduction
Tunnel point clouds are usually hard to clean. Many noisy or aberrant points (vent pipes, cable, light...) need to be removed from the inside of the tubular shape. This process is necessary if you want to make an accurate inspection of the tunnel.
Exercise overview
In this exercise, we see how to create the mesh of a tunnel directly from the whole point cloud. The Survey or AEC licenses are required for these computations.
Several steps are included in this exercise:
Create a neutral axis without the Neutral Axis command,
Extract the tunnel point cloud,
Improve the tunnel point cloud to create an accurate tunnel mesh,
The file used in this tutorial is TunnelExtraction.3dr
Overview
The file contains the point cloud of a tunnel and a neutral axis example. The cloud is displayed here in the Real Color representation mode, as each point was measured with colors. Nevertheless, the tunnel is rather dark; this is why you can change the representation mode if necessary.
Create manually a neutral axis
It could happen with a noisy point cloud that the automatic neutral axis detection gives a wrong result or doesn't work at all. Thus, we will see another method to carry out the tunnel extraction with a CAD Curve axis.
Swap to orthographic view in order to do a more accurate selection.
Show only Tunnel cloud and press Z on your keyboard to show a view from the top. Then launch the command Draw and draw a CAD Curve on the top side of the tunnel. You must use the Vertex / End Snap. Add as many vertices as necessary to follow an approximate axis.
Now, extend, from inside to outside, both ends of the CAD Curve (figure 1). You will have to use the 3 commands below:
Select the CAD curve and convert it to a polyline: From CAD Curve or Wire.
Then drag and drop both extremities using Edit Polyline.
Finally, convert the polyline to a CAD Curve using From Polyline.
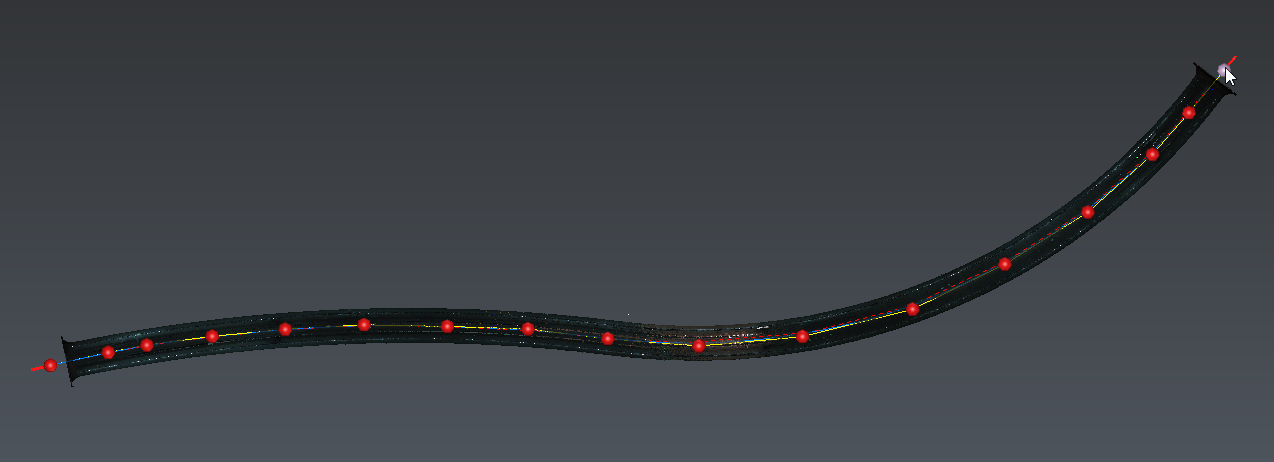 Figure 1: draw a freehand axis from the top view
Select the CAD curve and translate it vertically so as to place it inside the tunnel (-4.25m).
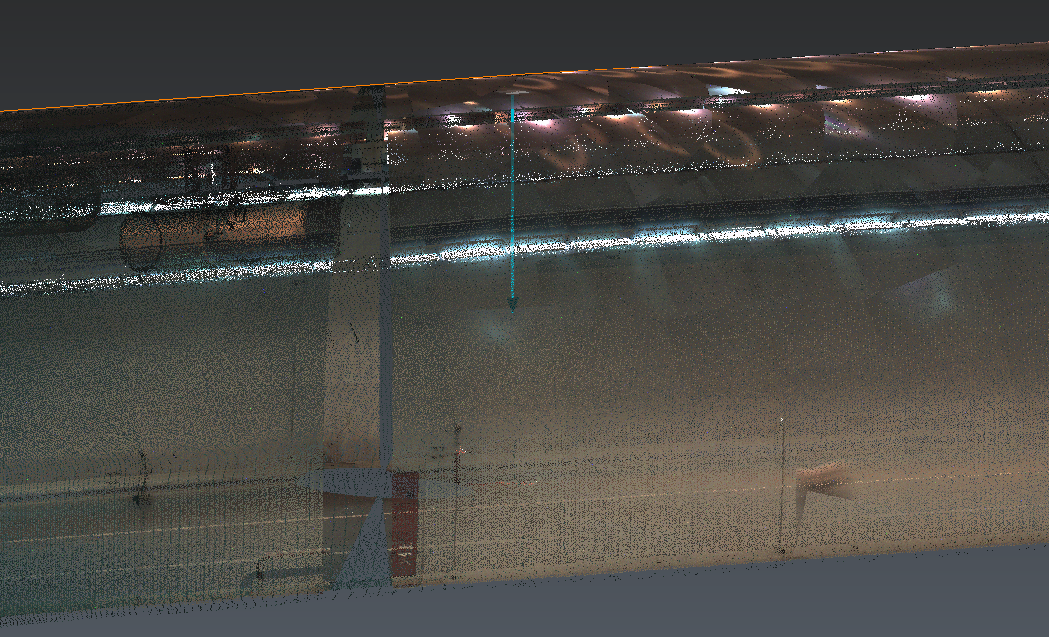 Figure 2: Vertical translation
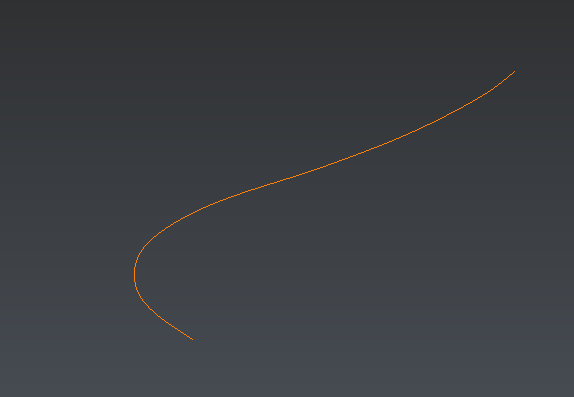 Figure 3: CAD Curve axis
You finally get a smooth axis which enables you to continue the exercise. You can also use B-Spline axis in the CAD group.
Extract the tunnel point cloud
Select the cloud Tunnel cloud and B-spline axis and launch the command Clean-up Tunnel.
Set the Extraction step parameter on 0.5 m.
Uncheck Try to keep details and Tunnel Mesh options.
Check On the tunnel and NOT on the tunnel options.
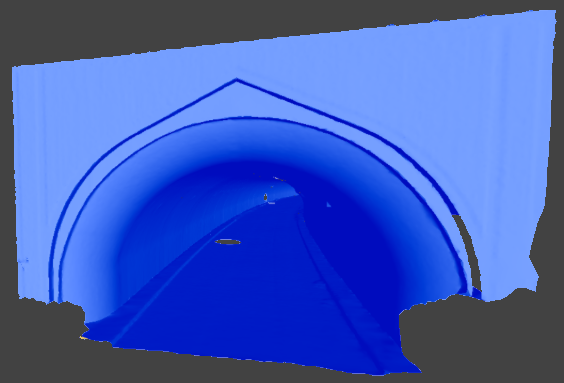
Click Preview to compute the result. The 2 point clouds are displayed after a few seconds. The blue one is the point cloud On the tunnel and the red one is the point cloud NOT on the tunnel. You can hide one cloud to see the other.
Click on OK to validate the results.
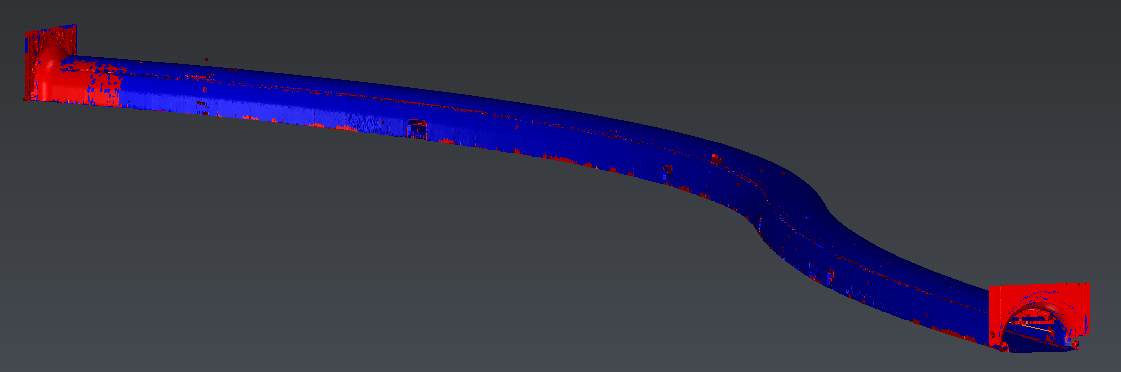 Figure 4: results
You can see that the algorithm classifies some wall or ground parts in the wrong point cloud: there is a small loss of information.
In this case, the parts are small. If you decrease the extraction step, these parts will get smaller and smaller. Thus, if you need quick results, you could use the blue point cloud to compute a mesh by clicking the Tunnel mesh option (before OK). We will try this method in the last section.
Make some improvements
Now, we are going to see how to make some improvements in order to keep more information of the initial survey.
Show only Tunnel cloud: Points NOT on the tunnel and select it.
Launch the command Distance.
Set the value for the Segmentation distance to the default one, by using the Restore default value button in the distance field. Choose to Filter small sub-clouds and set the value to 100 points.
Click Preview to compute the result.
1000 parts or sub-clouds will be created. You may spend a lot of time to remove so many parts. You should increase the Delete small pieces threshold. For example, set 1000 points as a threshold to keep less parts and click OK.
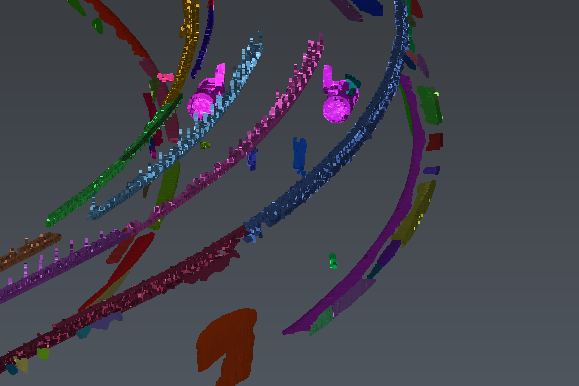 Figure 5: exploded clouds
Now, we can choose which sub-clouds are meaningful or meaningless. To perform this task, you can:
Stay in orthographic view,
Or select the B-Spline axis and use Quick Slice along curve,
Or swap to perspective mode and walk through into the tunnel (figure 6).
In this example, perspective mode is the most suitable choice Display Tunnel cloud: Points on the tunnel in a contrast color (white or grey) and walk into the tunnel following the neutral axis.
 Figure 6: traffic lights, small bushes, height gauge
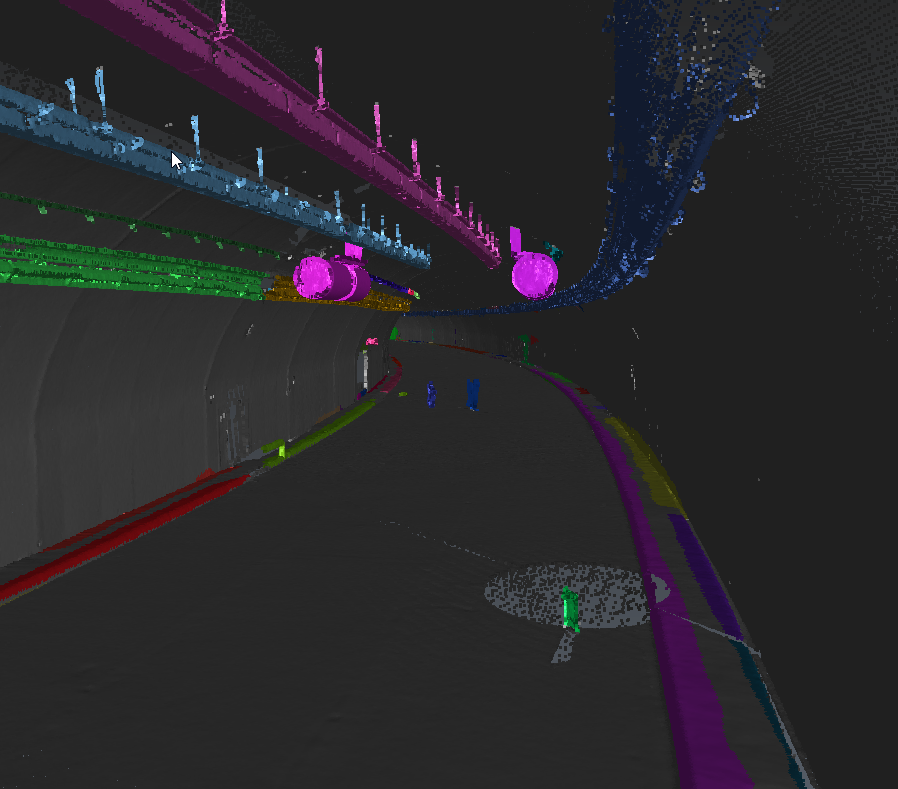 Figure 7: ventilators, lights, wires, surveying equipment, land-surveyors
As soon as you have removed the main unnecessary clouds, you can do manually the last cleaning job. Hide the Tunnel cloud: Points on the tunnel, change to camera ortho and launch Clean / Separate.
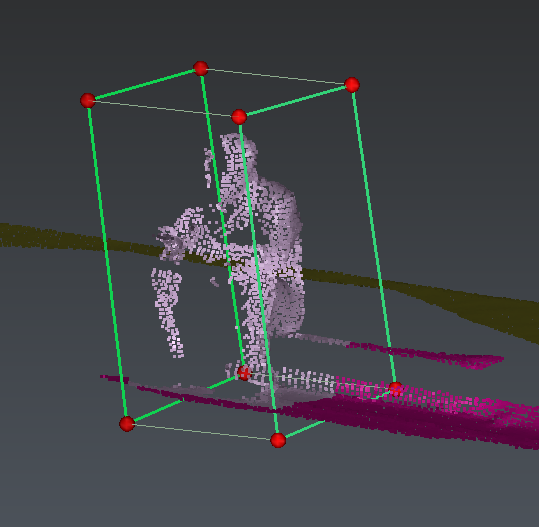 Figure 8: last cleaning
Note that explode with color could be an efficient way to remove the lights.
Select all the clouds and launch the command Merge Clouds. Then you can create a very accurate mesh. For example, you can try the following process:
3D Mesh Regular sampling with an average distance between points "0.1 m" and Try to keep only the external border,
Refine Mesh from Cloud with Deviation error of 1 cm and No noise reduction,
Global Smoothing Keep Details with a Smoothing intensity: Low and check Improve curvature areas.
Figure 9: accurate mesh