Unroll
![]()
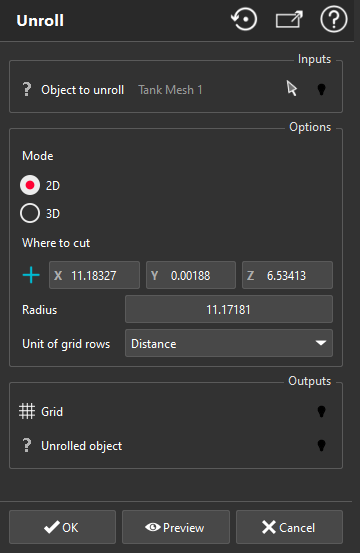
This command allows you to unroll the point cloud or the mesh of a tubular shape. Two types of results can be computed:
Unroll 3D: to have a planar view of the shape keeping the relief on the surface,
2D inspection map: to create a color map in 2 dimensions. This option fits well to colored or inspected objects.
The axis of the best cylinder of the tank will be used to unroll the tank along it. Before launching this command the Best Cylinder must be computed.
The tank project is necessary to launch the command. The best cylinder must have been computed.
From that, the object to unroll is defined like this:
a mesh is selected with the tank project when the command is launched: the selected mesh is used;
no selected mesh and inspected tank mesh available: the inspected tank mesh is used;
no selected mesh, no inspected tank mesh and shell mesh available: the shell mesh is used;
no selected mesh, no inspected tank mesh and no shell mesh available: the tank mesh defined for the project is used.
The inspected tank mesh is available after using the command Create Color Map and the shell mesh is available after using the command Separate Shell.
|
|
Define the mean radius Set the mean radius to process the unrolling. A mean radius is computed by default, click on Default to use this value. Define where to cut You can click a point on the mesh to define where it should be cut for unrolling. Then, the axis will be projected on the mesh and you can see along which line the object will be opened. The default position correspond to the reference point defined for the project. Turn the result If the result is not correctly oriented, you can turn it 90°. Export a picture You can export a picture of the current view of the 3D scene (in JPEG or BITMAP format). |
Create a report
This command automatically creates reporting data ![]() in your document. This object stores your results so as to create a report later.
in your document. This object stores your results so as to create a report later.
From the treeview click on the magnifier icon![]() to launch the report editor (or launch Report Editor). Then, each object
to launch the report editor (or launch Report Editor). Then, each object ![]() stands for a chapter which can be added to your report.
stands for a chapter which can be added to your report.
Refer to Reporting to learn how to customize your report.